Because in this post, I give an in-depth review of ConvertKit so you can see if it’s right for you.
Furthermore:
This ConvertKit review comes from someone who’s actually using ConvertKit right now.
You ready?
Let’s dive in…
Affiliate Disclosure: Some of the links on this site are affiliate links. If you click on one and buy something, I may get a commission at no extra cost to you. Go here to read the full disclosure.
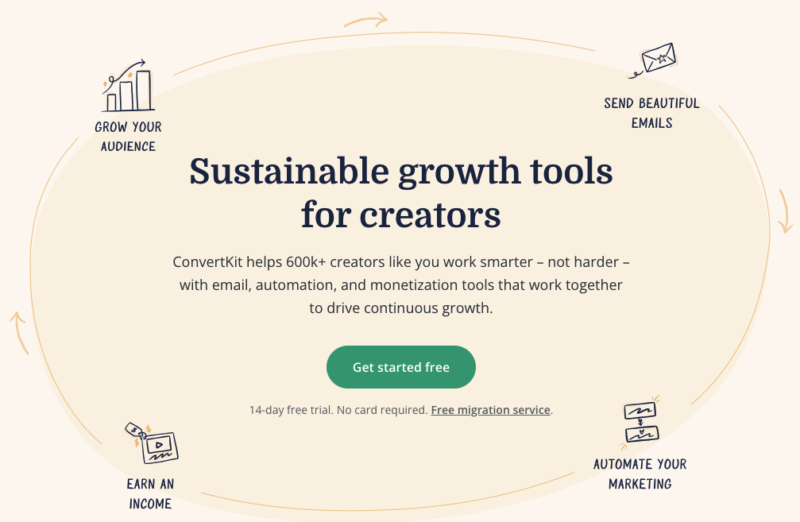
It’s used to manage email subscribers and do email marketing.
ConvertKit was founded by Nathan Barry and consists of 75 team members across 63 cities.
And their mission is simple:
Provide an easy to use platform to help businesses grow through email.
And they do exactly that.
Who ConvertKit is best for
ConvertKit is best for anyone looking to build an email list and implement email marketing in their business.
Whether you’re an affiliate marketer, blogger, influencer, YouTuber, or any kind of creator.
ConvertKit features
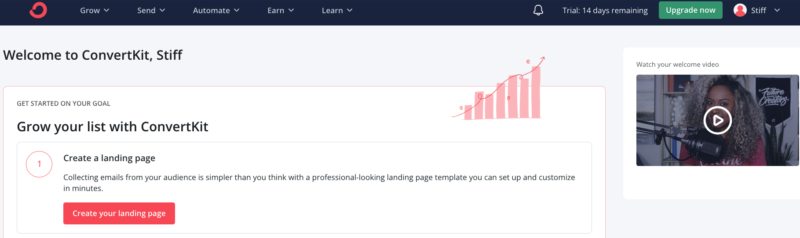
1: Simple Clean Dashboard
The ConvertKit dashboard is simple, clean, and easy to navigate.
Any feature you need can be found at the top of the dashboard, easily accessible from anywhere within the app:
Here’s a quick run down of the different features you’ll see at the top of the dashboard:
Grow: Where you’ll go when you want to create landing pages and signup forms.
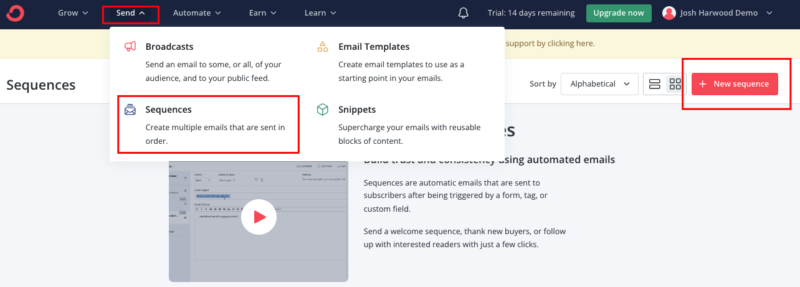
Send: Here you’ll find options to create email sequences and broadcast emails. You can also create snippets and customize email templates in this area.
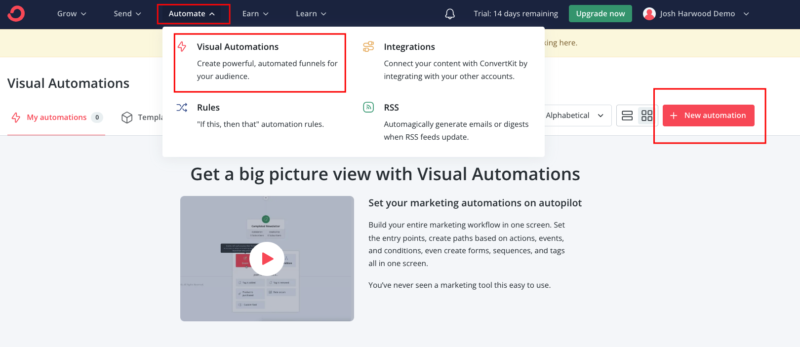
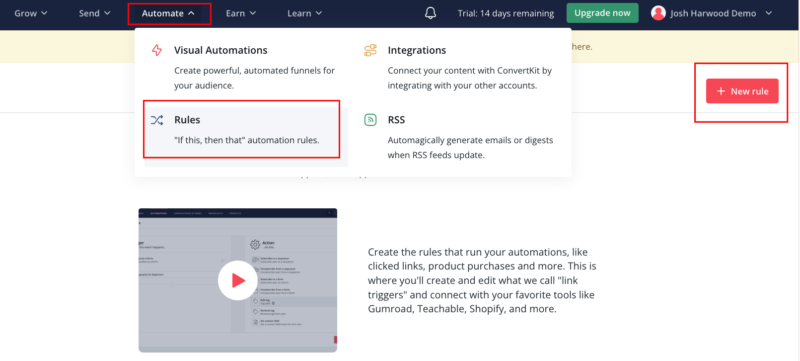
Automate: Where you’ll find the visual automations feature.
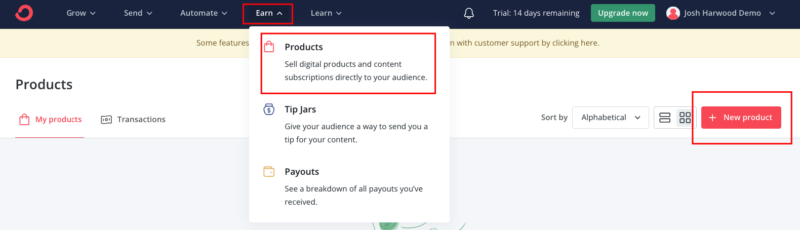
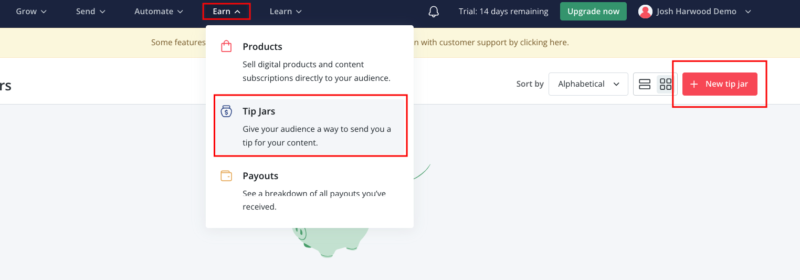
Earn: This tab is where you’ll go when you’re ready to sell digital products.
Learn: When you need help or want to learn something about ConvertKit, this is the place to go.
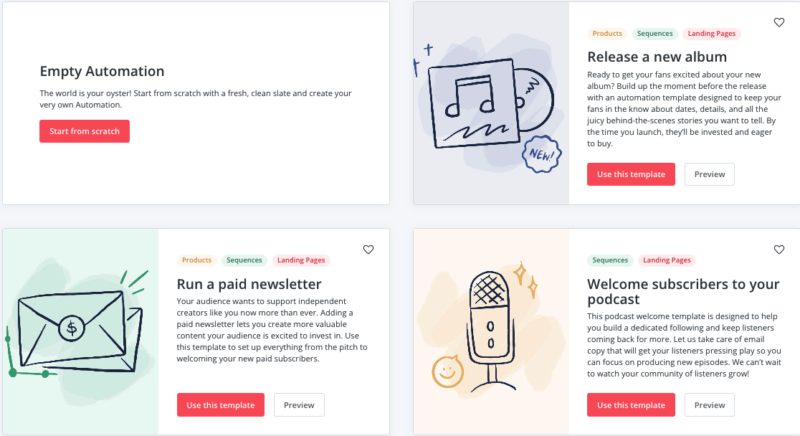
2: Create Landing Pages Easily
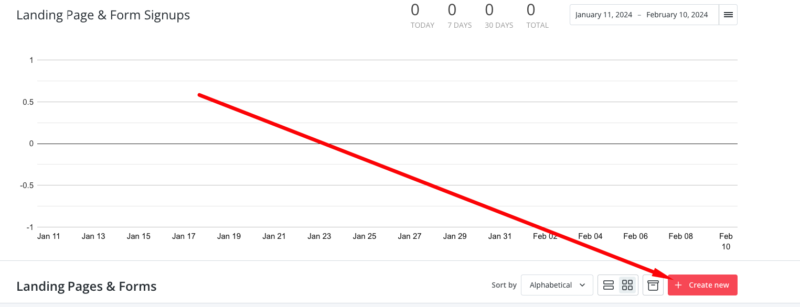
It’s easy to create landing pages inside of ConvertKit.
Go to Grow => LandingPages& Forms.
Then click the Create New button:
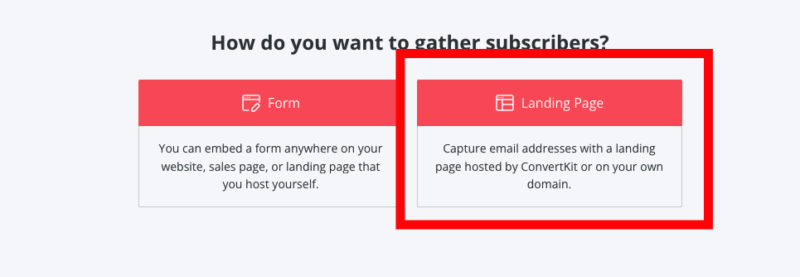
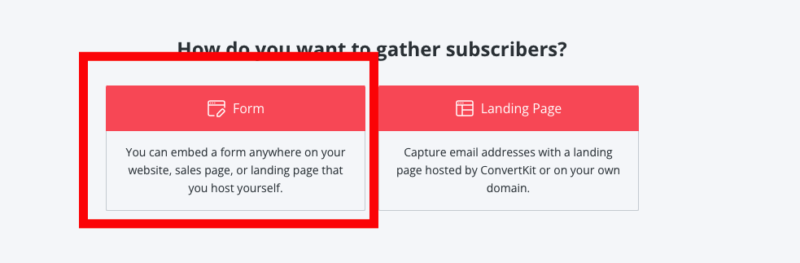
Next, choose the Landing Page option:
You’ll have a range of different landing page templates to choose from, including a Filter By Category section on the left:
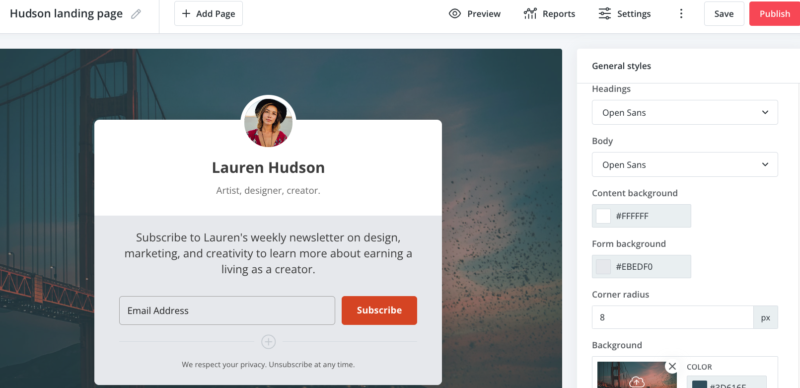
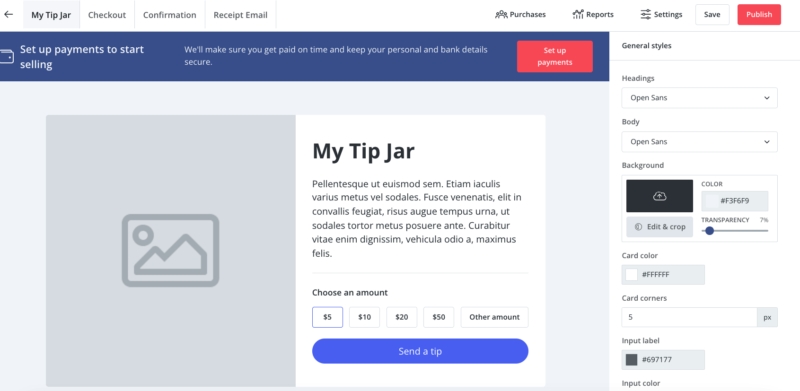
When you’ve chosen a template, you’ll be able to customize your template using the ConvertKit page editor.
The page editor looks like this:
On the right is your general styles area, where you’ll customize your landing page to your liking.
At the top is a Preview tab so you can preview your landing page.
Next to that is a Reports tab, so you can see data about your landing page when you’re sending traffic to that page.
You’ll also see a Settings tab within the editor.
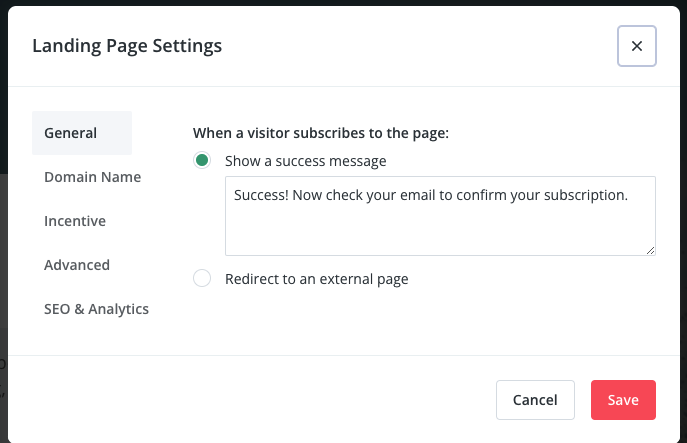
When you click on the settings tab, you’ll see several different options:
General: When you acquire a subscriber, you can redirect them to an external page, or show them a “success message” on your landing page. This is the area to choose which option you’d like.
Domain Name: Here you can assign your landing page to a custom domain (that you can set up in your account) and/or enter a “slug” for your ConvertKit subdomain.
Incentive: If you would like to enable double opt-in, this is the place to set it, or unset it.
Advanced: You can choose to hide or show your landing page to return visitors, and enable reCAPTCHA.
SEO & Analytics: Where you can add a meta title and description tags for SEO.
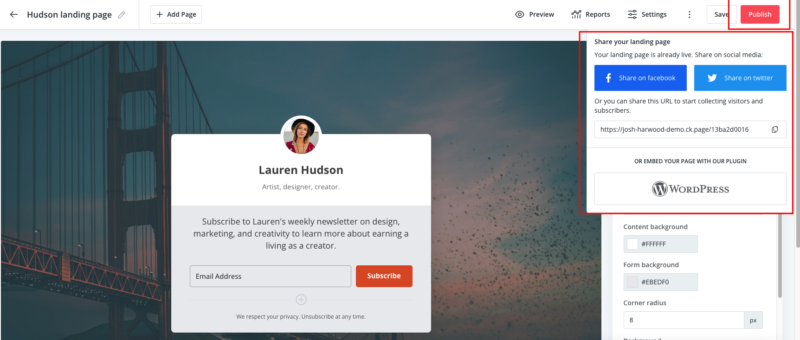
When you’re happy with your customizations, click the Publish tab to the top right.
You’ll then have the option to share your landing page:
When sharing your landing page, there are several different options to choose from:
Share On Facebook: This option let’s you share directly to your Facebook account.
Share On Twitter: This option let’s you share directly to your Twitter account.
Share URL: This is the URL of your landing page that you can share anywhere online. Your landing page will be hosted by ConvertKit.
Share On WordPress: This option let’s you share directly into WordPress using the ConvertKit plugin.
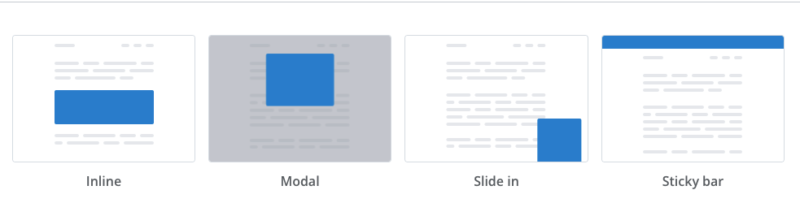
Modal: A modal is a popup style form. This can be triggered by a click, or as an exit intent popup that shows when someone’s leaving your website.
Slide In: A form that slides onto the screen.
Sticky Bar: This form “sticks” to the top of your website.
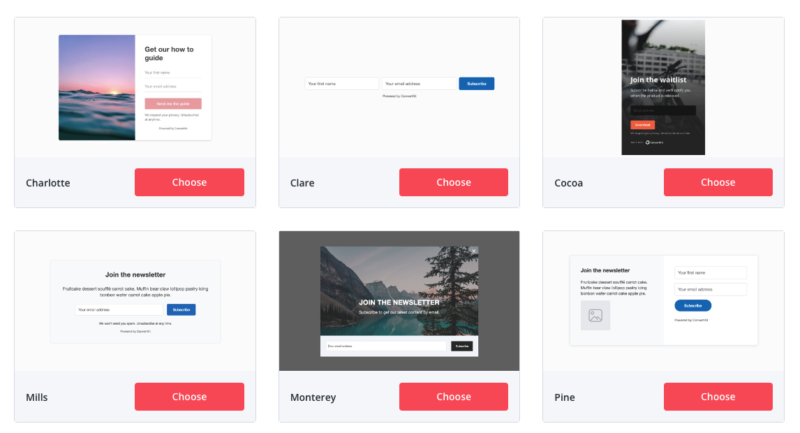
When you’ve chosen your desired form type, you’ll then have the option to choose a template for your form:
When you’ve chosen a template, you’ll be taken to the ConvertKit page editor to customize your form.
The layout and settings are identical to the landing page settings.
4: Email Broadcasts
Email broadcasts are one time emails you send your subscribers in real time.
To create a broadcast, go to Send => Broadcasts => NewBroadcast:
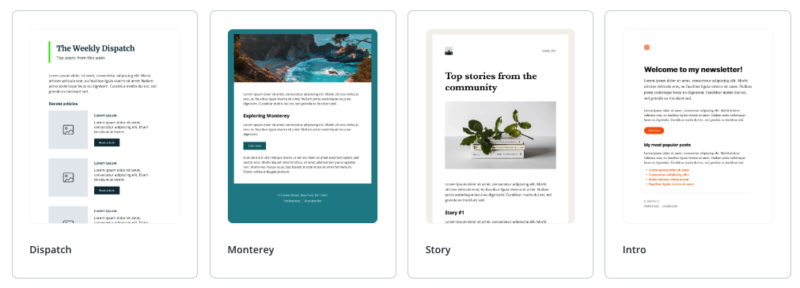
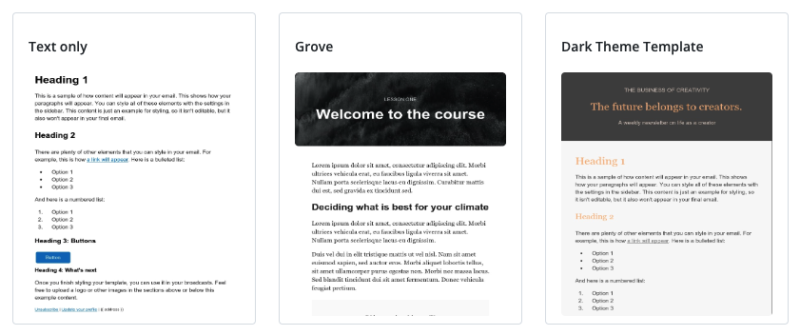
Next, you’ll need to choose a template for your email broadcast.
ConvertKit offers a range of different templates, as well as the option to design your own email template:
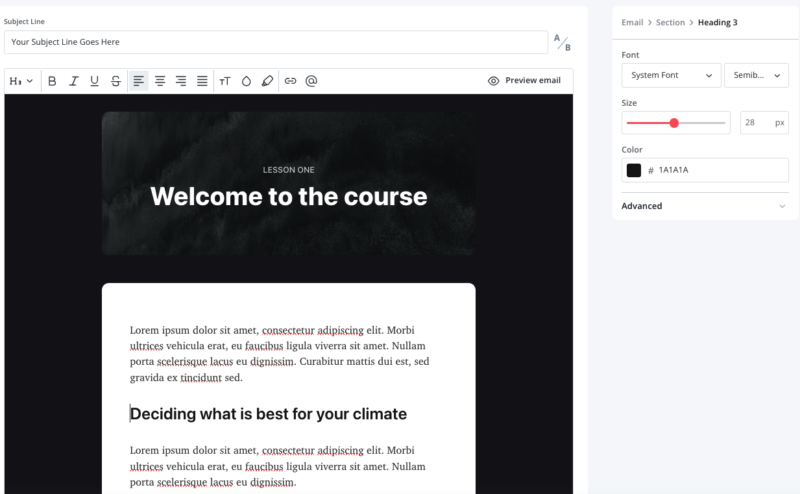
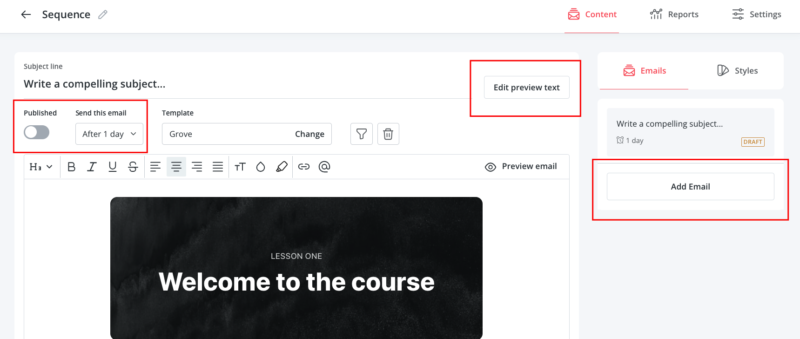
When you’ve chosen a template, you’ll then be able to write your email broadcast:
When you’ve written your email broadcast, it’s then time to choose who to sent it to, and who to send it from:
Your from email address is set within your account.
ConvertKit will require you to set this up before you can send emails.
The Add Filter section is there so you can send broadcast emails to specific subscribers based on certain criteria. (Tags and segments which we’ll look at shortly.)
Or you can choose to send the email to all of your subscribers.
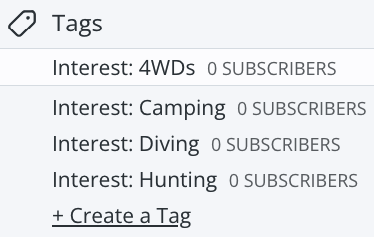
Tags are labels you can add to subscribers to create fixed groups of subscribers.
Segments are fluid groups of subscribers who meet certain filter conditions.
You’ll use tags and segments as a way to organize your subscribers based on interests, links clicked, forms opted in from, location, age etc.
In my own account, at the end of every automation I add a tag called “Broadcasts.”
When I send broadcast emails, I send the emails only to subscribers with the tag “Broadcasts,” so only subscribers with that tag get my broadcast emails.
Any subscriber within an automation and/or email sequence, does not get the email. (Which I want, because they’re getting my sequence emails.)
You can create tags and segments by going to Send => Subscribers.
You’ll see tags and segments on the right:
Tags can be manually added to subscribers from the subscribers page.
Or, you can create a tag then have it applied automatically via automations.
Here’s an example of tags.
These tags are created to organize subscribers based on interest, and they’re applied within automations.
The tag applied depends on the automation the subscriber went through:
You can then use segments to group any combination of tags and/or based on any condition that you set when creating the segment.
Like this:
Segments are a great way to group different tags together into one segment for when you’re sending broadcasts.
When you send a broadcast, you’ll have the option to send to specific segments.
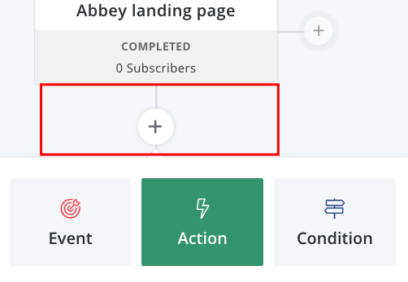
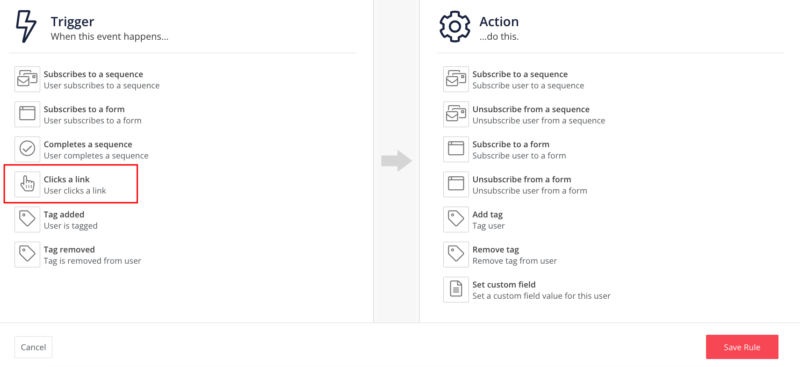
8: Link Triggers
Link triggers are incredible.
They’re essentially an automation trigger.
You set up “rules” where, if a subscriber clicks a specific link, then this happens.
To create a link trigger, go to Automate => Rules => New Rule:
Then choose the Clicks A Link option:
You’ll have different options to choose from when the link is clicked.
Such as add a tag, remove a tag, subscribe to a sequence, subscribe to a form, or add a custom field.