Because in this post, I give an in-depth review of ConvertKit so you can see if it’s right for you.
Furthermore:
This ConvertKit review comes from someone who’s actually using ConvertKit right now.
You ready?
Let’s dive in…
Affiliate Disclosure: Some of the links on this site are affiliate links. If you click on one and buy something, I may get a commission at no extra cost to you. Go here to read the full disclosure.
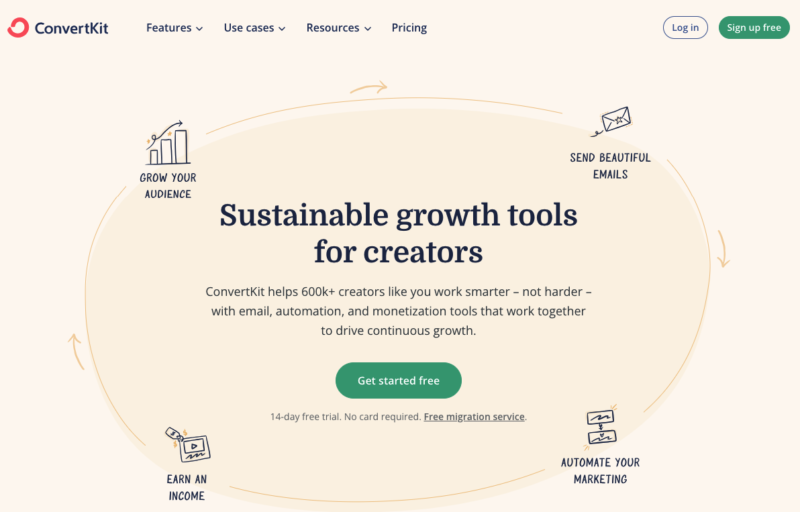
ConvertKit Review (2024 Edition)
So, What Is ConvertKit Exactly?
ConvertKit is an email marketing service.
It’s used to manage email subscribers and do email marketing.
ConvertKit was founded by Nathan Barry and consists of 75 team members across 63 cities.
And their mission is simple:
Provide an easy to use platform to help businesses grow through email.
And they do exactly that.
Who Should Use ConvertKit?
ConvertKit should be used by anyone looking to build an email list and implement email marketing in their business.
Whether you’re an affiliate marketer, blogger, influencer, YouTuber, or any kind of creator.
Top 10 Features Of ConvertKit
1: Simple Clean Dashboard
The ConvertKit dashboard is simple, clean, and easy to navigate.
Any feature you need can be found at the top of the dashboard, easily accessible from anywhere within the app:
Here’s a quick run down of the different features you’ll see at the top of the dashboard:
Grow: Where you’ll go when you want to create landing pages and signup forms.
Send: Here you’ll find options to create email sequences and broadcast emails. You can also create snippets and customize email templates in this area.
Automate: Where you’ll find the visual automations feature.
Earn: This tab is where you’ll go when you’re ready to sell digital products.
Learn: When you need help or want to learn something about ConvertKit, this is the place to go.
2: Create Landing Pages Easily
A landing page is a stand alone page designed to do one thing and one thing only, build an email list.
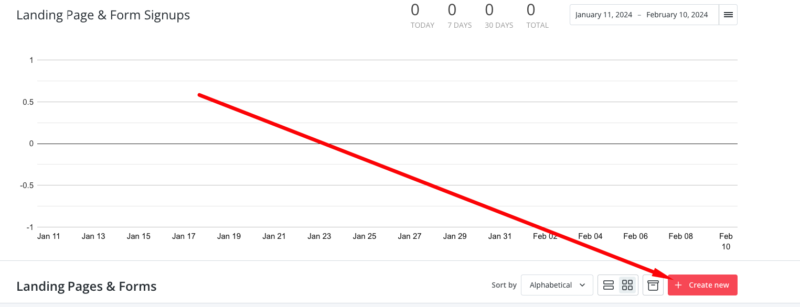
To create a landing page go to Grow => LandingPages& Forms.
Then click the Create New button:
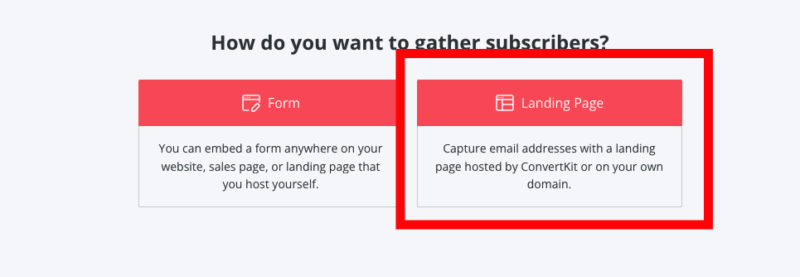
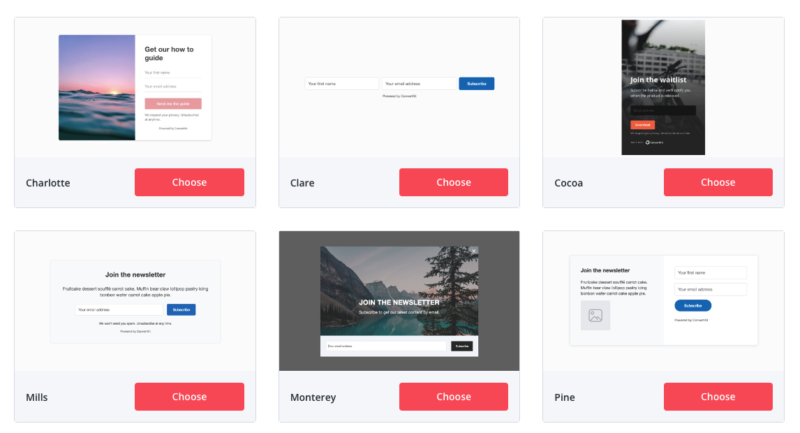
Next, choose the Landing Page option:
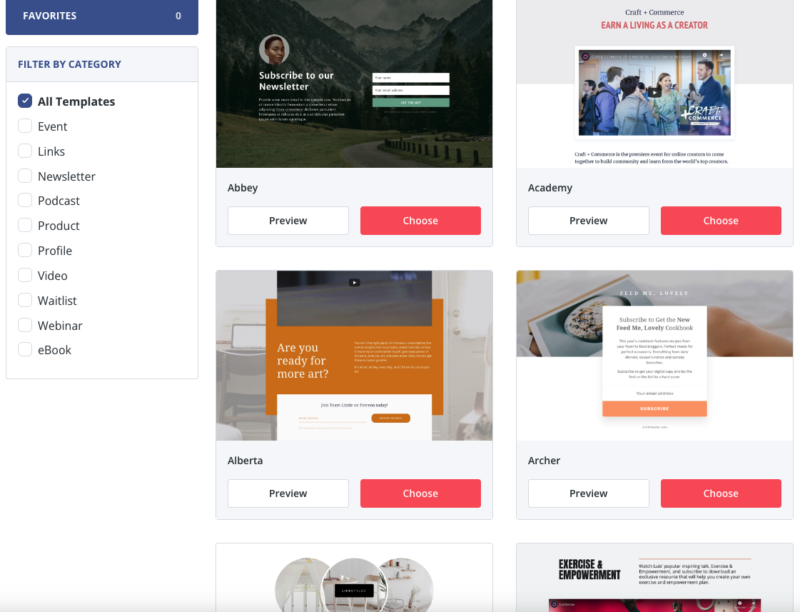
You’ll have a range of different landing page templates to choose from, including a Filter By Category section on the left:
When you’ve chosen a template, you’ll be able to customize your template using the ConvertKit page editor.
The page editor looks like this:
On the right is your general styles area, where you’ll customize your landing page to your liking.
At the top is a Preview tab so you can preview your landing page.
Next to that is a Reports tab, so you can see data about your landing page when you’re sending traffic to that page.
You’ll also see a Settings tab within the editor.
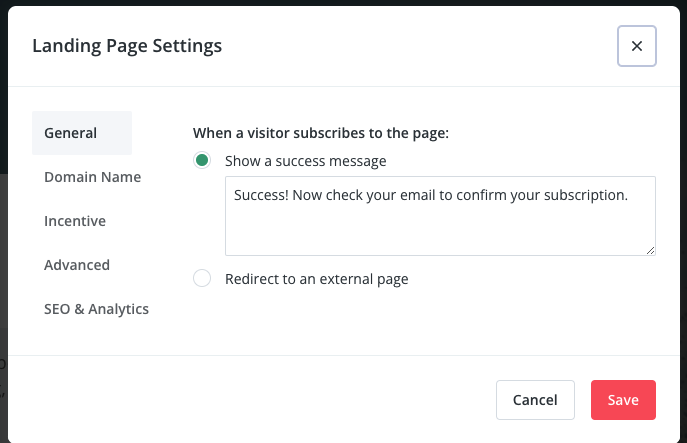
When you click on the settings tab, you’ll see several different options:
General: When you acquire a subscriber, you can redirect them to an external page, or show them a “success message” on your landing page. This is the area to choose which option you’d like.
Domain Name: Here you can assign your landing page to a custom domain (that you can set up in your account) and/or enter a “slug” for your ConvertKit subdomain.
Incentive: If you would like to enable double opt-in, this is the place to set it, or unset it.
Advanced: You can choose to hide or show your landing page to return visitors, and enable reCAPTCHA.
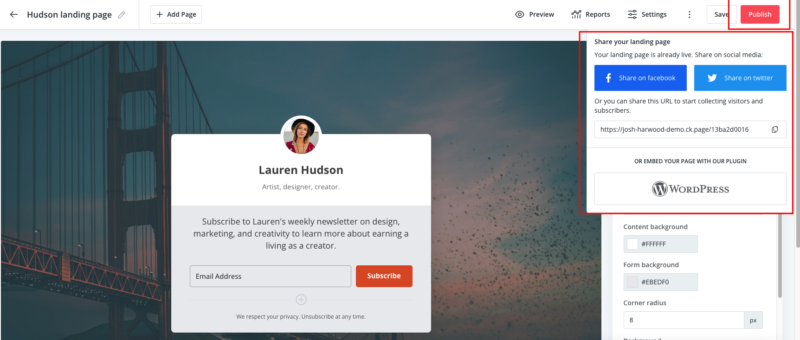
When you’re happy with your customizations, click the Publish tab to the top right.
You’ll then have the option to share your landing page:
When sharing your landing page, there are several different options to choose from:
Share On Facebook: This option let’s you share directly to your Facebook account.
Share On Twitter: This option let’s you share directly to your Twitter account.
Share URL: This is the URL of your landing page that you can share anywhere online. Your landing page will be hosted by ConvertKit.
Share On WordPress: This option let’s you share directly into WordPress using the ConvertKit plugin.
Quick Tip: You’ll have the option to trigger an email sequence or add tags etc when someone opts in from your landing page via automations. We’ll look at automations shortly.
3: Create Signup Forms Easily
Creating a signup form is similar to creating a landing page.
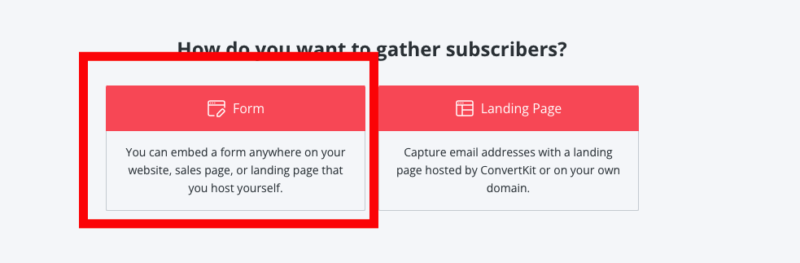
Go to Grow => Landing Pages & Forms, then click the Create New button:
Then choose the Form option:
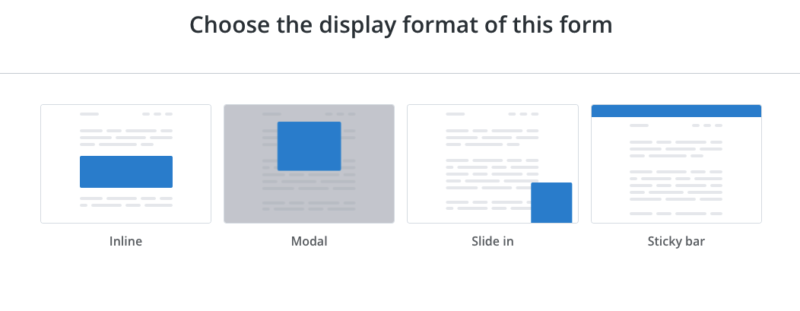
You’ll then need to choose what type of signup form you’d like to create:
Here’s a quick rundown of the different types of forms available:
Modal: A modal is a popup style form. This can be triggered by a click, or as an exit intent popup that shows when someone’s leaving your website.
Slide In: A form that slides onto the screen.
Sticky Bar: This form “sticks” to the top of your website.
When you’ve chosen your desired form type, you’ll then have the option to choose a template for your form:
When you’ve chosen a template, you’ll be taken to the ConvertKit page editor to customize your form.
The layout and settings are identical to the landing page settings.
4: Email Broadcasts
Email broadcasts are one time emails you send your subscribers in real time.
To create a broadcast, go to Send => Broadcasts => NewBroadcast:
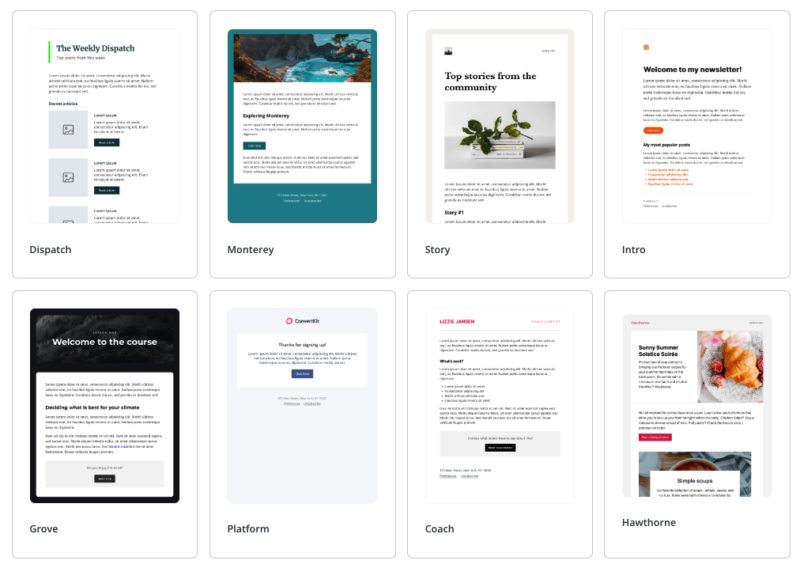
Next, you’ll need to choose a template for your email broadcast.
ConvertKit offers a range of different templates, as well as the option to design your own email template:
When you’ve chosen a template, you’ll then be able to write your email broadcast:
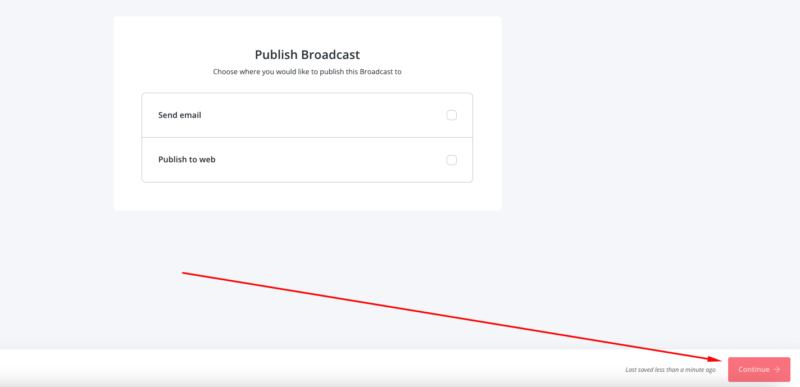
When you’ve written your email broadcast, click the Continue button to the bottom right.
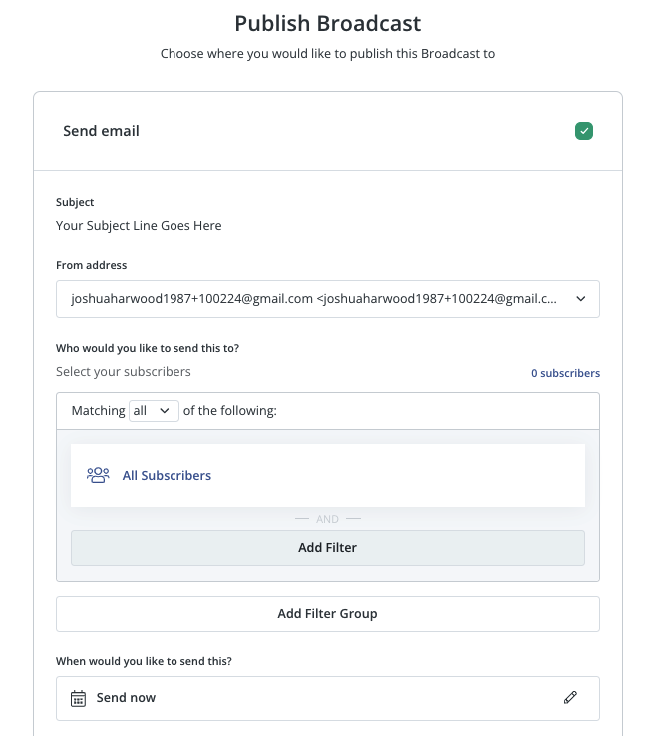
Then, choose whether you want to publish your broadcast as an email, or to the web:
It’s then time to choose who to send the email from, who to send the email to, and when to send it:
Your from email address is set within your account.
ConvertKit will require you to set this up before you can send emails.
The Add Filter section is there so you can send broadcast emails to specific subscribers based on certain criteria. (Tags and segments which we’ll look at shortly.)
Or you can choose to send the email to all of your subscribers.
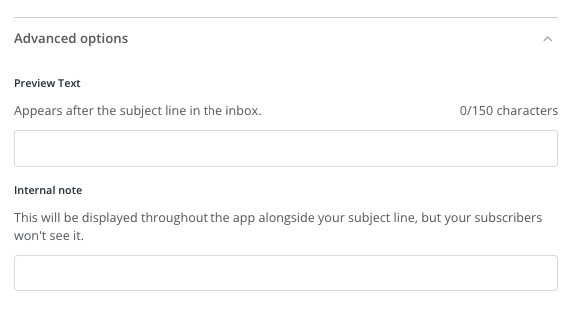
You’ll also see a Preview Text section and an Internal Note section:
The preview text section is a text preview of the email when it’s seen in someone’s inbox.
And the internal note section, that’s there for you to add notes about the email.
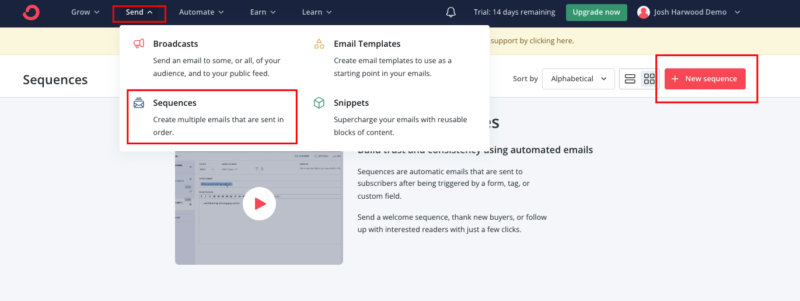
5: Sequences
Sequences are automated follow up emails that are triggered when someone joins your list.
You can queue up as many emails as you like, and each email will go out at specified intervals that you set within the sequence settings.
To create a sequence, go to Send => Sequences => NewSequence:
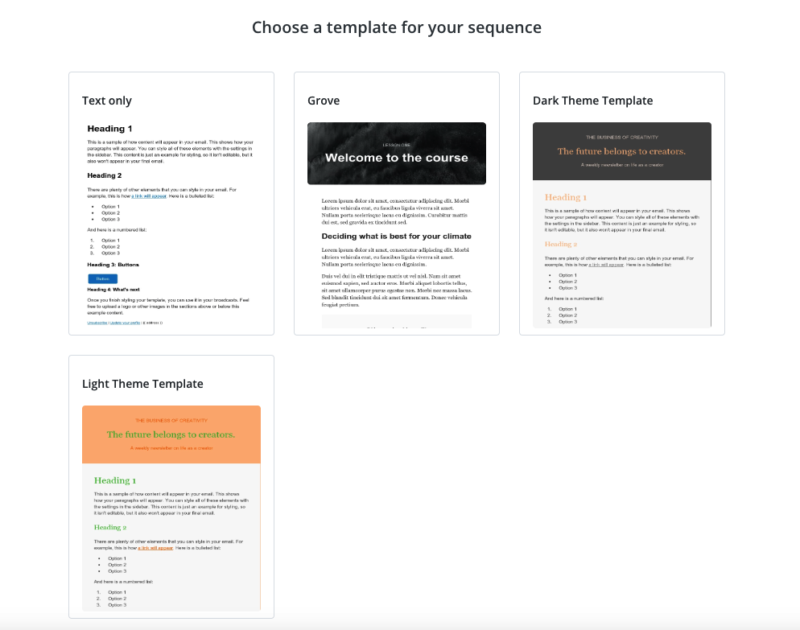
Then choose an email template for your sequence:
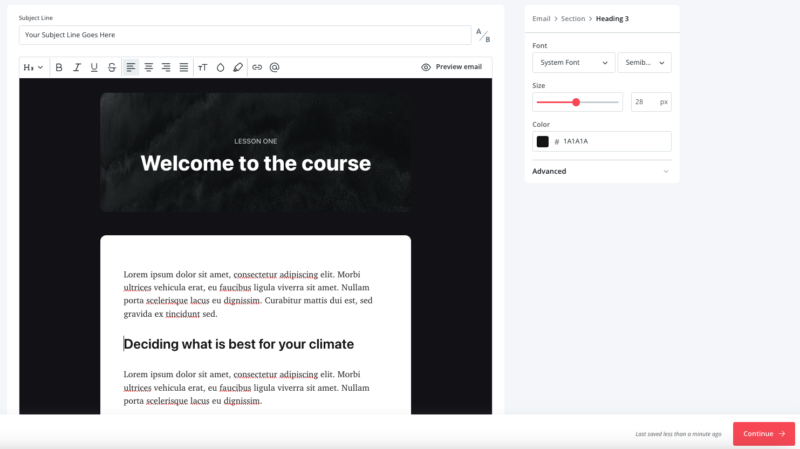
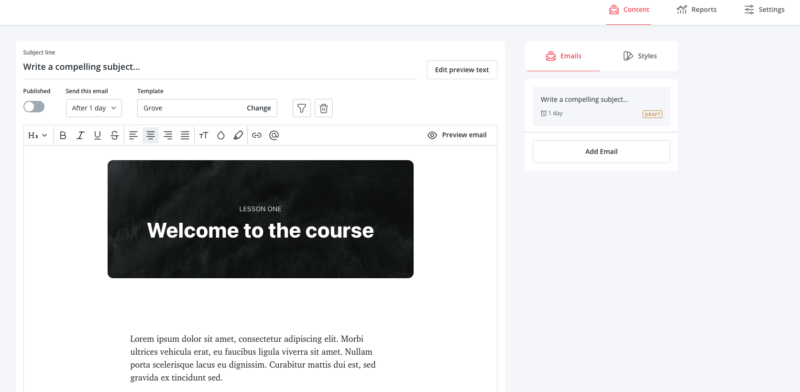
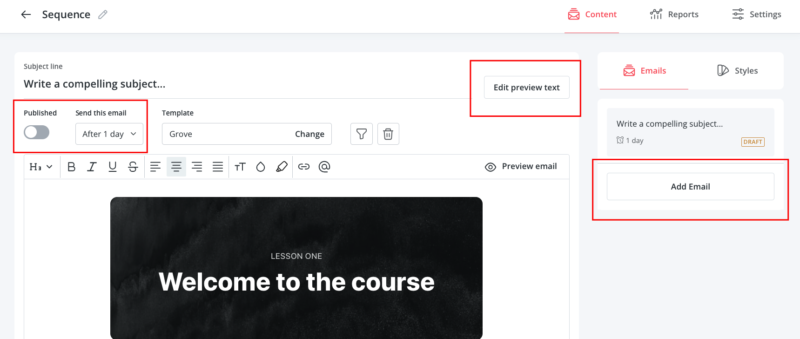
You can then start creating your email sequence using the ConvertKit email editor.
This is pretty much the same as the broadcast editor:
There’s a few different settings within the editor that are worth taking a quick look at:
Published: You’ll use this to make your sequence live when you’re ready.
Send This Email: Here’s where you’ll choose the delay for that specific email. You can set it to immediately by changing the day to 0.
Edit Preview: A text preview of the email when it’s seen in someone’s inbox
Add Email: Click that button to add more emails into the sequence
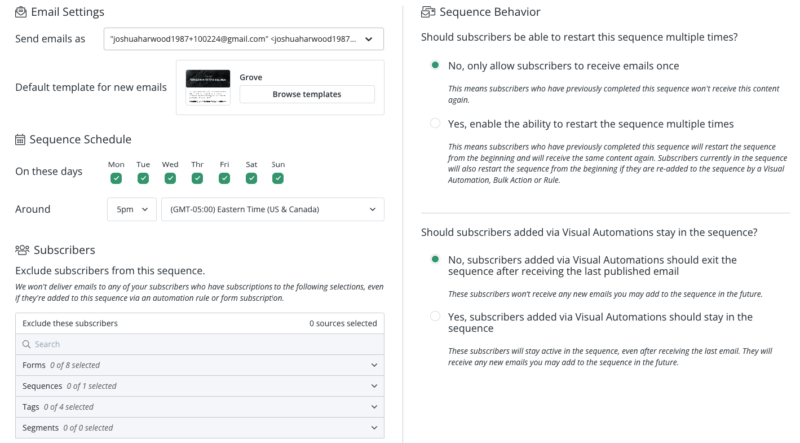
There’s also a reports tab so you can see stats when your email sequence is live.
And a settings tab so you can make changes to the sequence itself.
The settings area looks like this:
Here you can edit things like sending the emails out on specific days and times, exclude certain subscribers from getting the emails and whether a subscriber can restart the sequence.
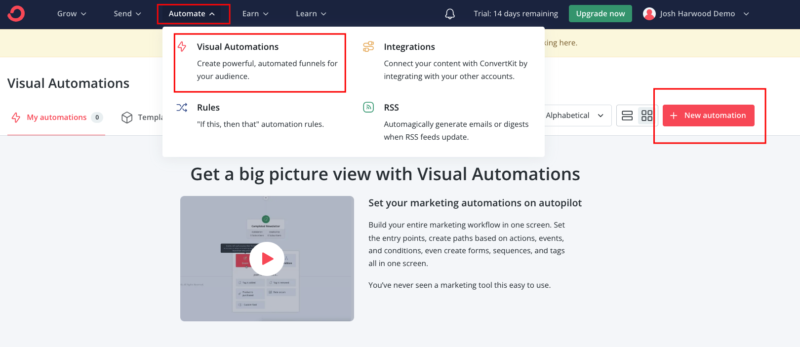
6: Visual Automations
Visual automations are used to build “subscriber journeys.”
From organizing your subscribers, to triggering email sequences, you can set up your ideal customer journeys with visual automations.
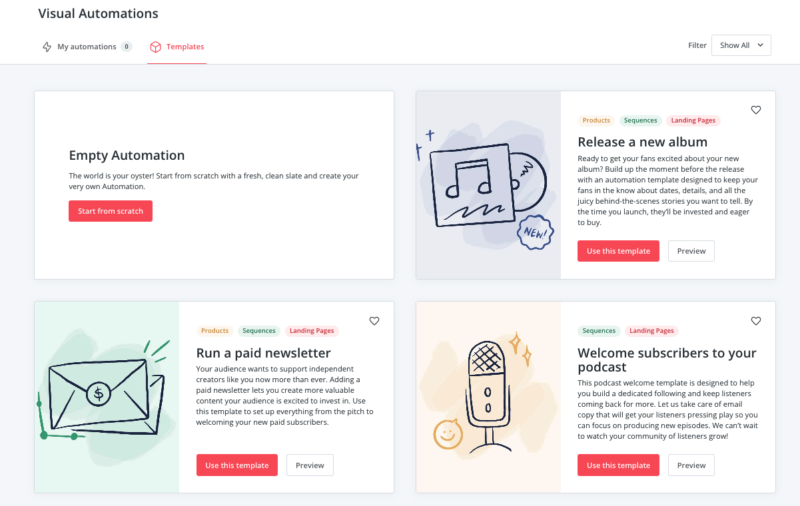
To create an automation, go to Automate => VisualAutomations => NewAutomation:
Next, it’s time to select an automation template.
You can start with pre-built automations, or build your own from scratch:
In this demo, I’ll be starting from scratch.
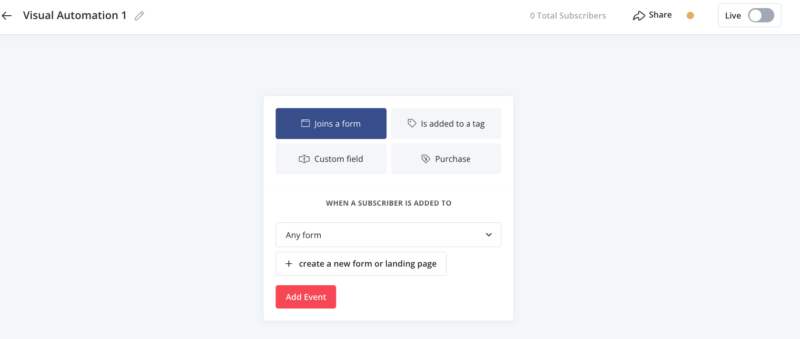
Which looks something like this:
There are several different options to choose from to start an automation.
Joins A Form: Triggers the automation when a subscriber opts into one of your signup forms or landing pages.
Is Added To A Tag: Starts the automation when a tag(s) has been added to a subscribers profile.
Custom Field: Where you can trigger the automation based on a custom field added to a subscribers profile.
Purchase: This triggers the automation based on the purchase of a product.
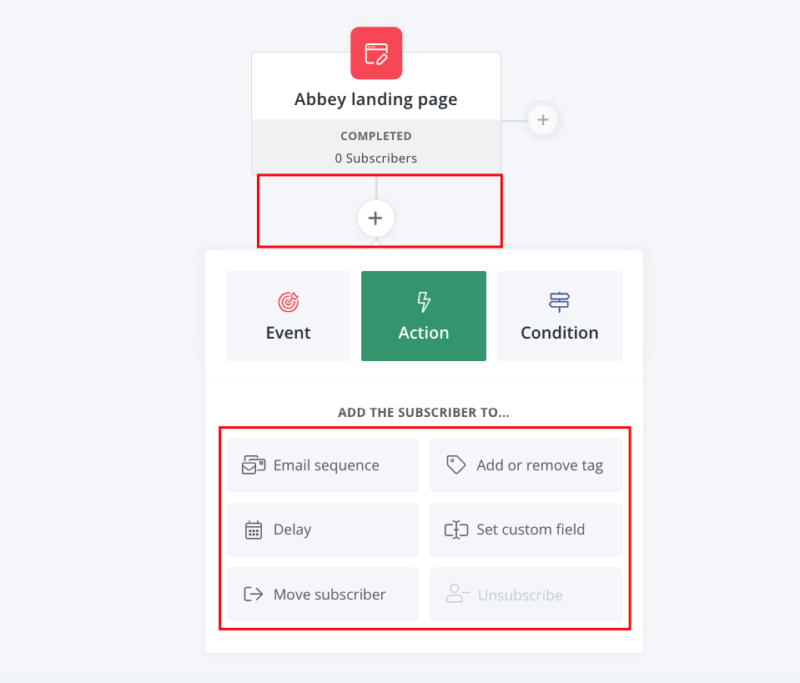
You can then add onto the automation by clicking the little + icon.
Then you can choose the next step in the automation
Like so:
There are many different things you can do with automations.
You can set up simple automations, or complex automations.
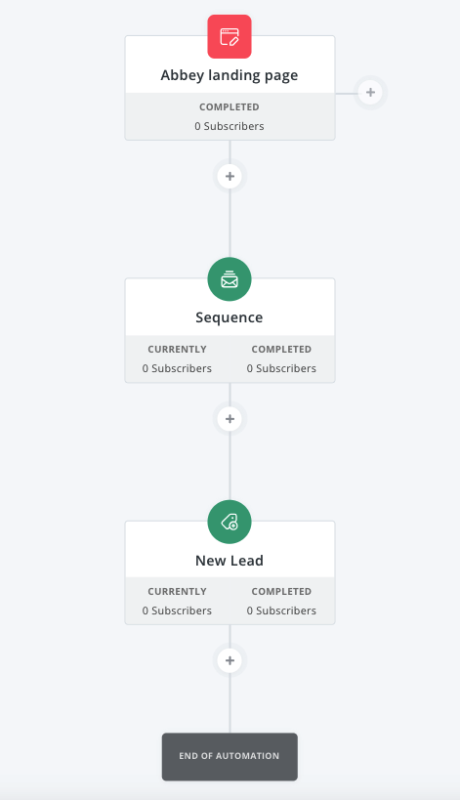
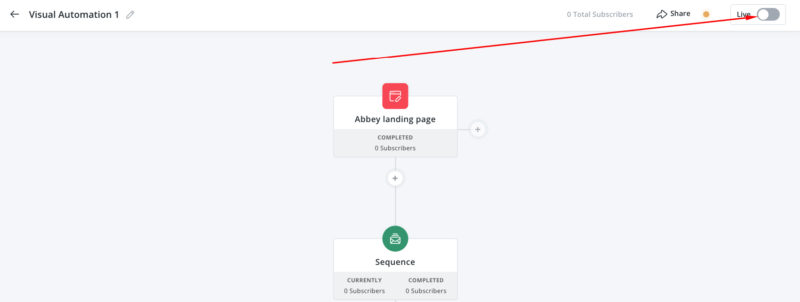
Here’s what a simple automation looks like:
In this example, the automation is triggered when a subscriber opts into the Abbey landing page.
They’re then added to an email sequence.
At the end of the sequence, a “new lead” tag is added to each subscriber.
Then that’s the end of the automation.
When you’ve built your automation and you’re ready to go live with it, click the Live button to the top right:
Your automation will then be triggered when subscribers meet the first condition of your automation.
And they’ll then be taken through each step of the automation until the end of the automation.
7: Tags & Segments
Tags are labels you can add to subscribers to create fixed groups of subscribers.
Segments are fluid groups of subscribers who meet certain filter conditions.
You’ll use tags and segments as a way to organize your subscribers based on interests, links clicked, forms opted in from, location, age etc.
In my own account, at the end of every automation I add a tag called “Broadcasts.”
When I send broadcast emails, I send the emails only to subscribers with the tag “Broadcasts,” so only subscribers with that tag get my broadcast emails.
Any subscriber within an automation and/or email sequence, does not get the email. (Which I want, because they’re getting my sequence emails.)
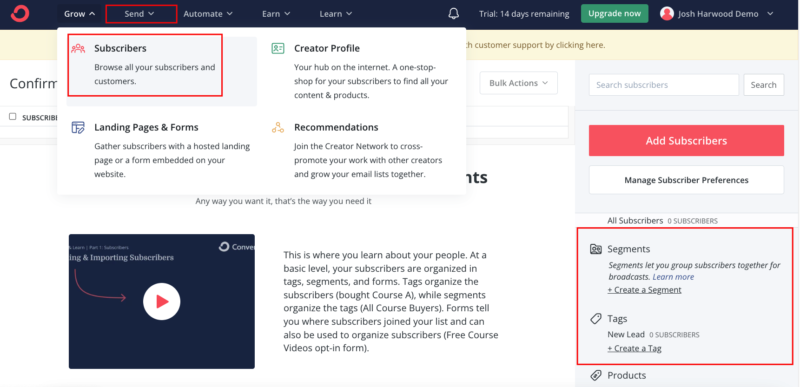
You can create tags and segments by going to Send => Subscribers.
You’ll see tags and segments on the right:
Tags can be manually added to subscribers from the subscribers page.
Or, you can create a tag then have it applied automatically via automations.
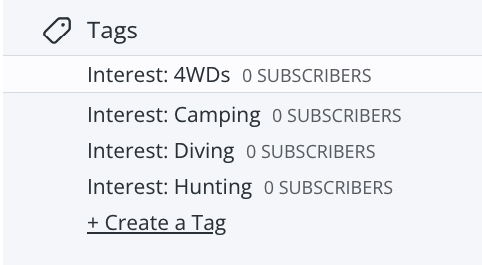
Here’s an example of tags.
These tags are created to organize subscribers based on interest, and they’re applied within automations.
The tag applied depends on the automation the subscriber went through:
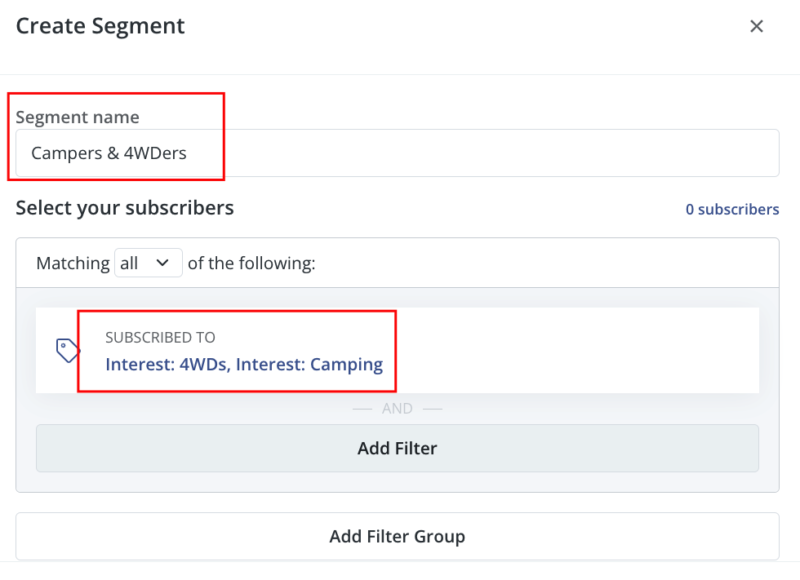
You can then use segments to group any combination of tags and/or based on any condition that you set when creating the segment.
Like this:
Segments are a great way to group different tags together into one segment for when you’re sending broadcasts.
When you send a broadcast, you’ll have the option to send to specific segments.
Like this:
8: Link Triggers
Link triggers are incredible.
They’re essentially an automation trigger.
You set up “rules” where, if a subscriber clicks a specific link, then this happens.
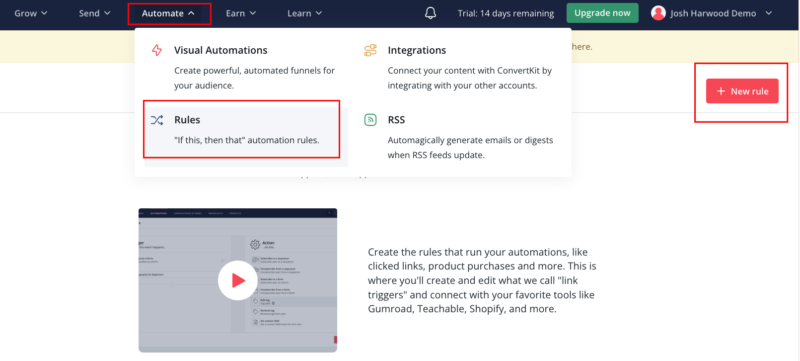
To create a link trigger, go to Automate => Rules => New Rule:
Then choose the Clicks A Link option:
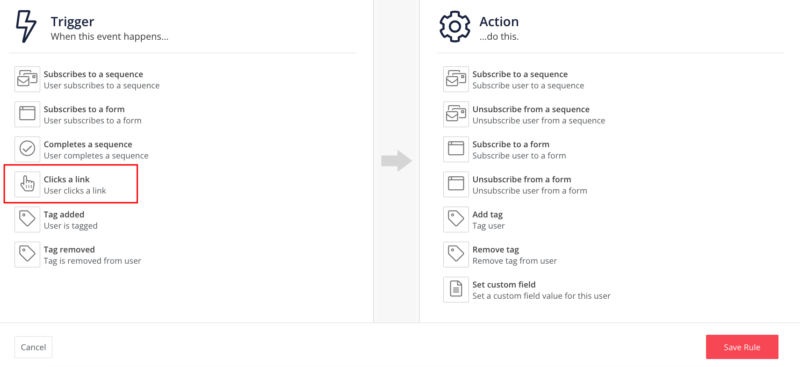
You’ll have different options to choose from when the link is clicked.
Such as add a tag, remove a tag, subscribe to a sequence, subscribe to a form, or add a custom field.
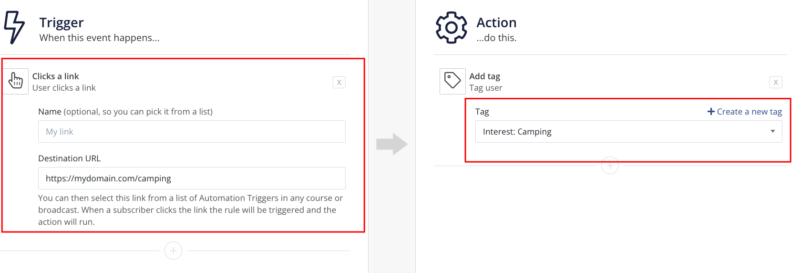
For example, if you wanted to add a tag when a certain link is clicked, here’s how you would create that:
In this example, the tag Interest: Camping is added whenever a subscriber clicks the link I’ve specified on the left hand side under the Trigger settings.
Link triggers are another way to organize subscribers based on interest, but doing so when they click links.
You’ll notice there are other “rules” you can set too, not just link triggers.
But, most of them can be done within automations.
Whereas link triggers are not part of automations and need to be set up here.
9: Products
ConvertKit allows you to sell products within your account.
These can be one time payment products, or subscription based.
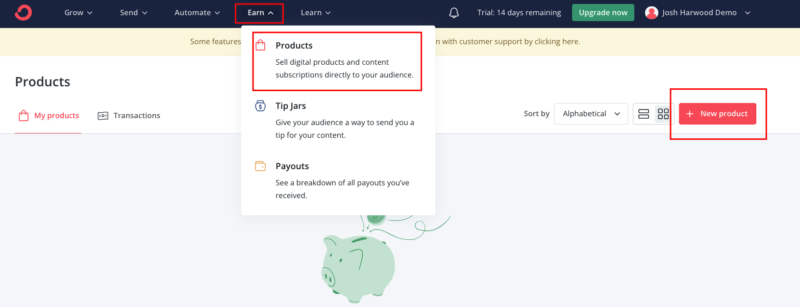
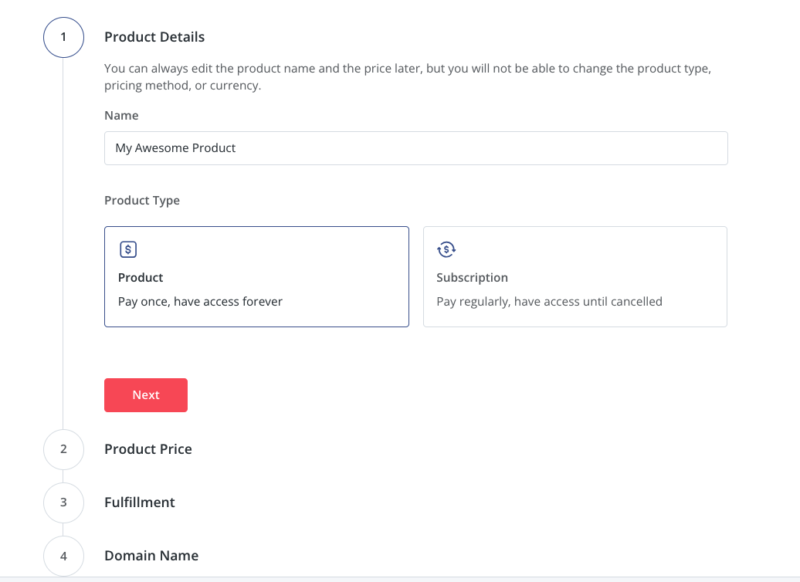
To create a product, go to Earn => Products => New Product:
Next, you’ll need to add product details, such as the product name, product type, price and fulfillment:
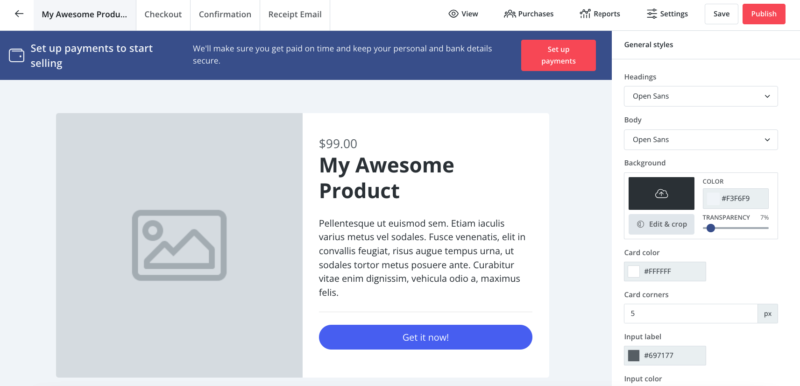
Your product will be sold from a page, similar to a landing page.
This page acts as a “checkout” page.
You can edit this page just like editing a landing page or a form.
You’ll see this option when you’ve setup your product.
Like so:
When you’ve setup your product, you’ll then need to setup payments.
This will allow you to collect payments from your customers.
You’ll see a Setup Payments tab to the top right.
Just note, you will need a Stripe account before you can set up payments.
Stripe is a payment processor that integrates with ConvertKit.
When you have a Stripe account, click the Setup Payments tab, and ConvertKit will connect your Stripe account with your ConvertKit account so you can take payments.
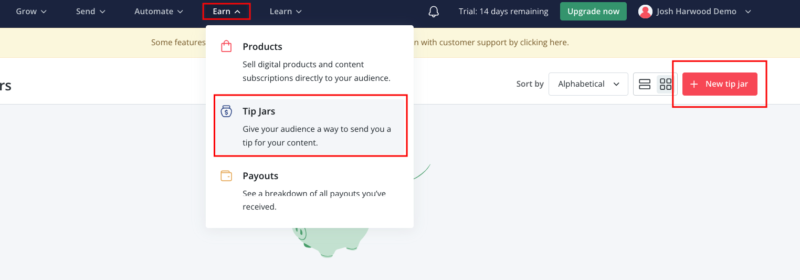
10: Tip Jars
Tip jars are similar to products in that, you collect money.
The difference with tip jars is, you don’t create any kind of deliverable like you do when creating products.
Tip jars are awesome and really easy to set up.
To create a tip jar head to Earn => Tip Jars => New Tip Jar:
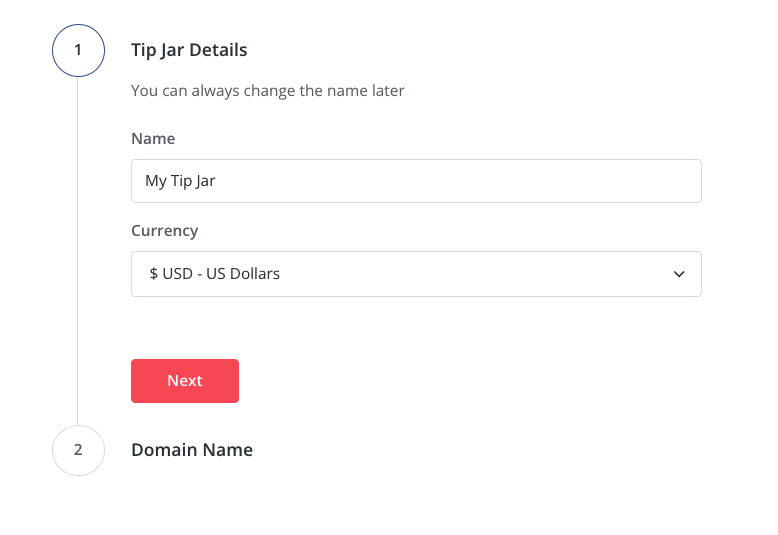
Next, you’ll need to give your tip jar a name and choose the currency of your tip jar:
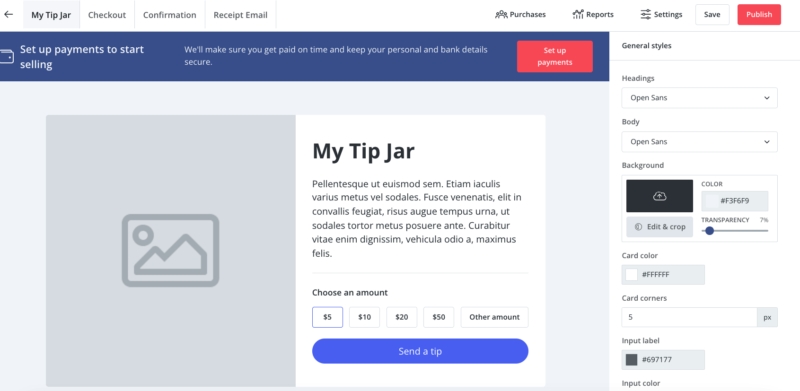
When you’ve created your tip jar, it’ll look like this:
Your tip jar is essentially a page that you can share with your audience. (Same as a product.)
Similar to editing landing pages and forms, you can also edit your tip jar and customize it to your liking.
And just like with products, you’ll need to connect with Stripe in order to process payments.
ConvertKit Pricing
Pros & Cons Of ConvertKit
Pros:
Easy to use
Visual automations
Link triggers
Landing page builder
Sign up forms
Custom email templates
High deliverability
API integrations
Creator university
Products
Tip jars
Free plan available
Cons:
Not many customization options when creating email templates
ConvertKit Review: Final Thoughts
Well, that wraps up this ConvertKit review.
Is ConvertKit worth it?
Absolutely!
I signed up for ConvertKit back in 2018 & I’ve used it ever since.
I can honestly say, I’ve never been let down, or disappointed with the platform.
It’s easy to use, deliverability is amazing, and the automations are top notch.