

If you want to learn how to create an affiliate website…
This post has you covered.
Because today, I’m going to show you exactly how to create your own affiliate site fast!
Furthermore:
You’ll also learn simple ways to promote affiliate products on your site.
Let’s begin…
How To Create An Affiliate Website In 2024
(The Beginners Guide + Examples)
Thanks to technology, it’s actually really easy to create your own website.
In fact:
It’s so easy, you don’t need any “tech skills.”
To create an affiliate site, there’s only 3 steps involved:
- Get a domain name & setup web hosting
- Install a website builder
- Customize your affiliate website
Let’s go over each of these steps in more detail…
Step 1: Get A Domain Name & Setup Web Hosting
What is a domain name, and what is web hosting?
A “domain name” is the address of your website.
For example:
My domain name is: www.AffiliateHelpCenter.com and Google’s domain name is www.Google.com
And “web hosting” is a service that makes your domain name accessible on the internet.
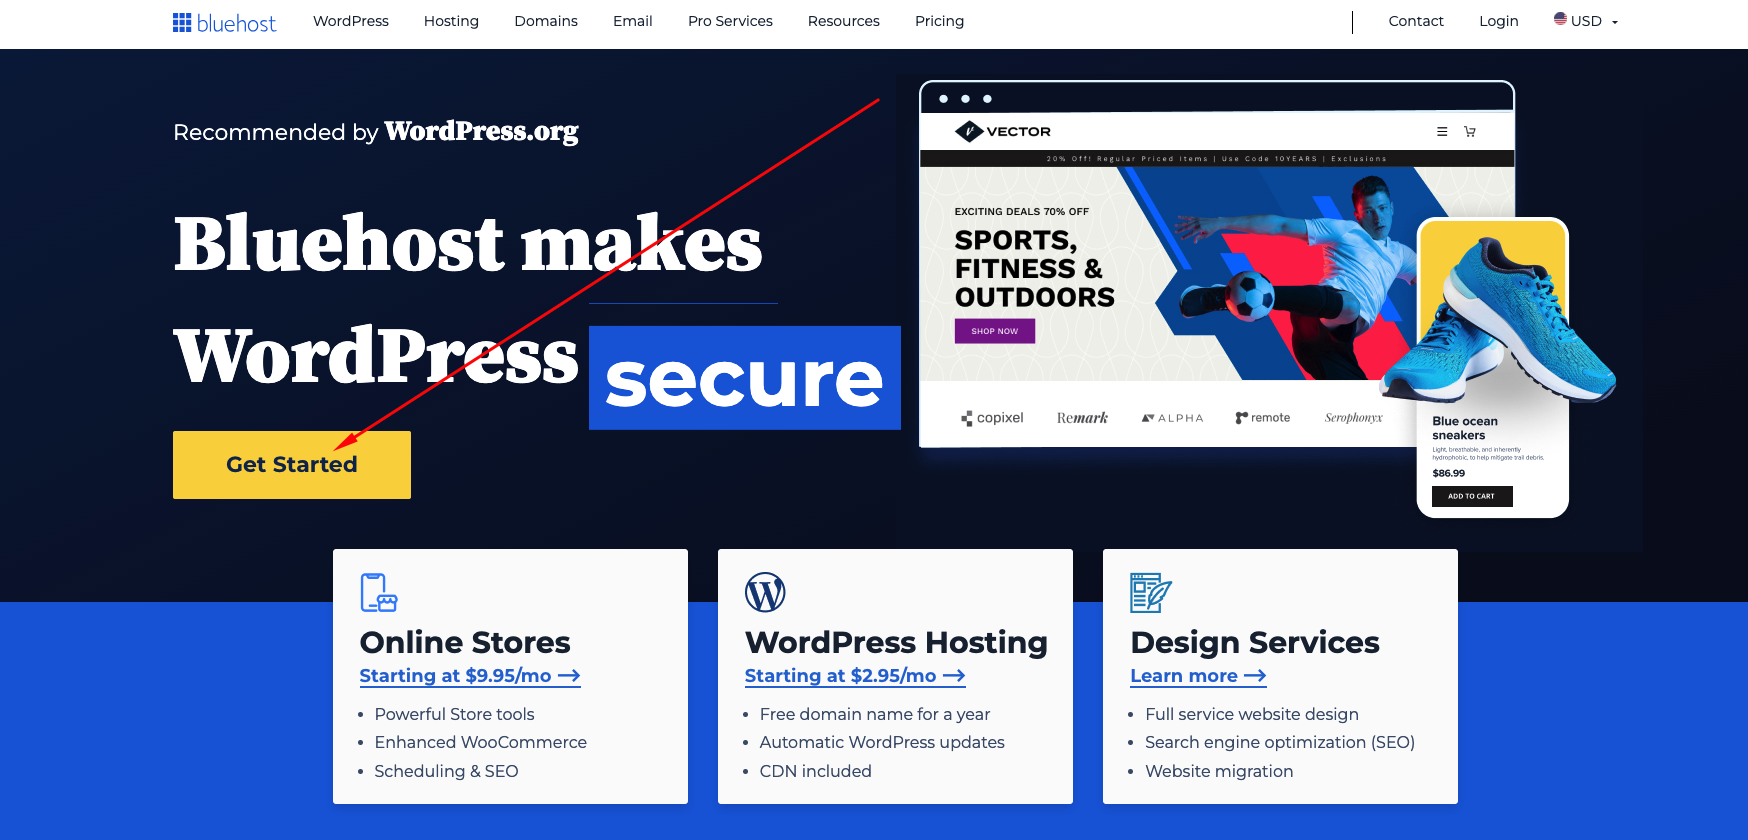
You can get web hosting and a domain name through BlueHost.
This is the company I use personally, as do most people for their affiliate sites.
To get started with your site, head over to BlueHost and click the Get Started button:
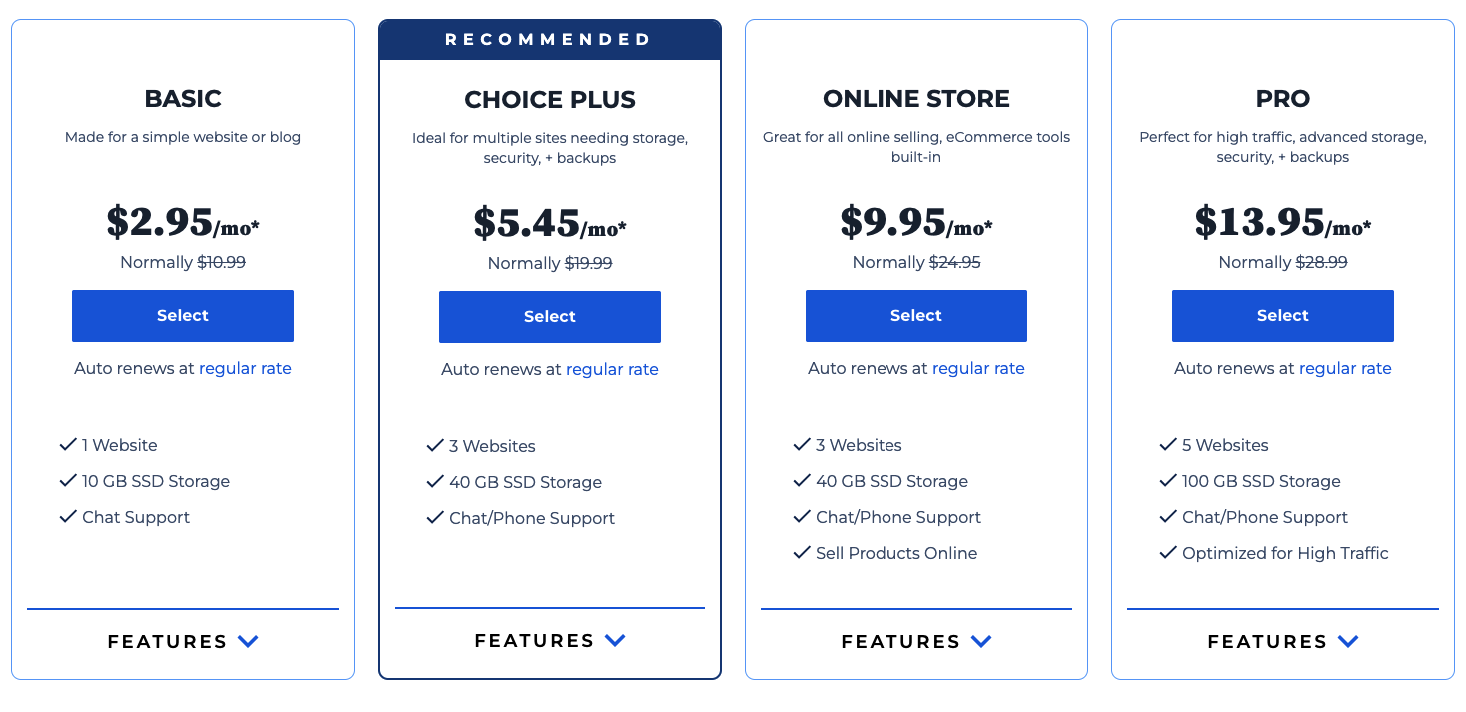
Select a web hosting plan:
It’s up to you which plan you choose, but personally, I’d recommend the Choice Plus plan. (Either plan will work fine though.)
Because this comes with “domain privacy,” which protects your personal information from being published anywhere online.
Just click the blue Select button on your choice of plan:
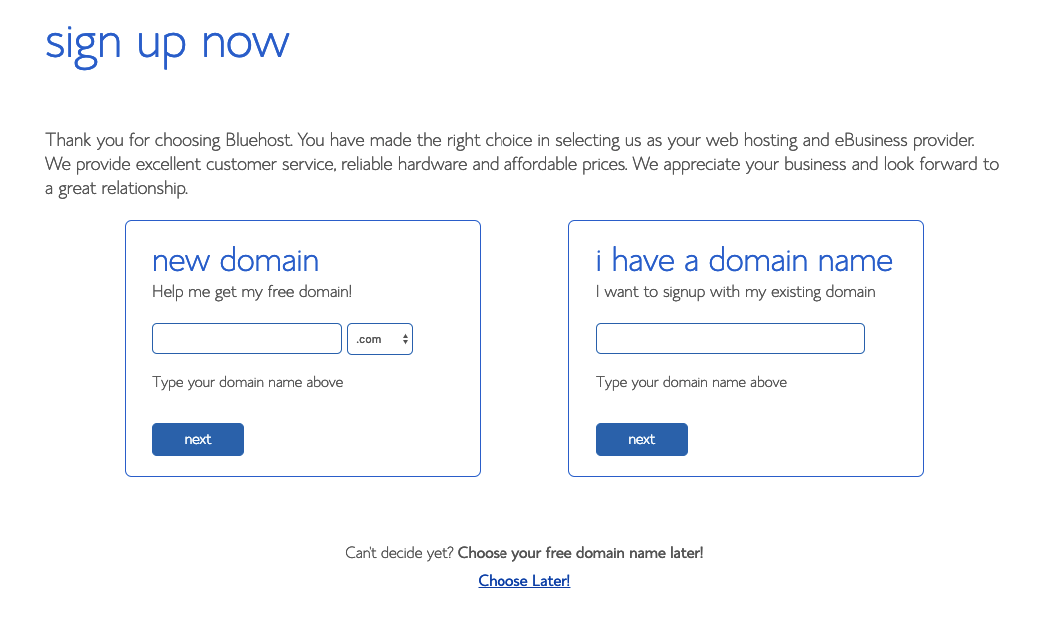
Choose your free domain name:
If you haven’t come up with a domain name yet, that’s ok.
You can skip this step, and set up your domain at a later time:
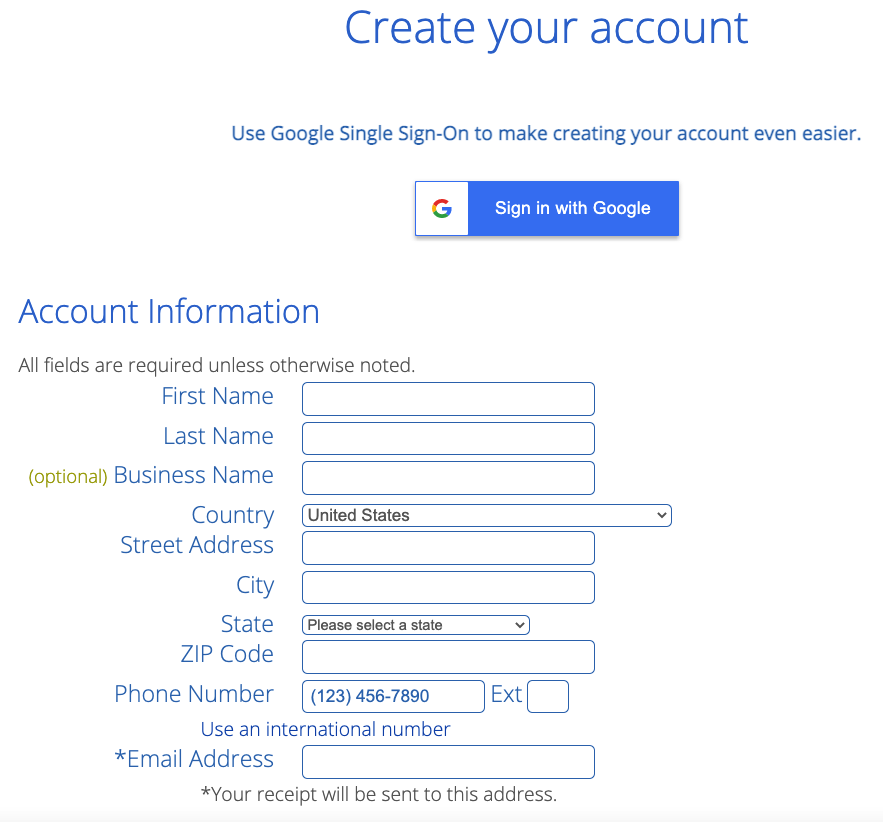
Create a BlueHost account:
Simply fill in the “account information” section such as your name, and address etc.
Be sure to use a valid email address, because information about your account will be sent to that address.
Or if it’s easier, you can sign up via Google:
Confirm your package information:
BlueHost doesn’t have a monthly payment option.
Instead, they only offer you to pay 12, 24, or 36 months up front.
By doing so, it saves you money, but it’s a great deal either way:

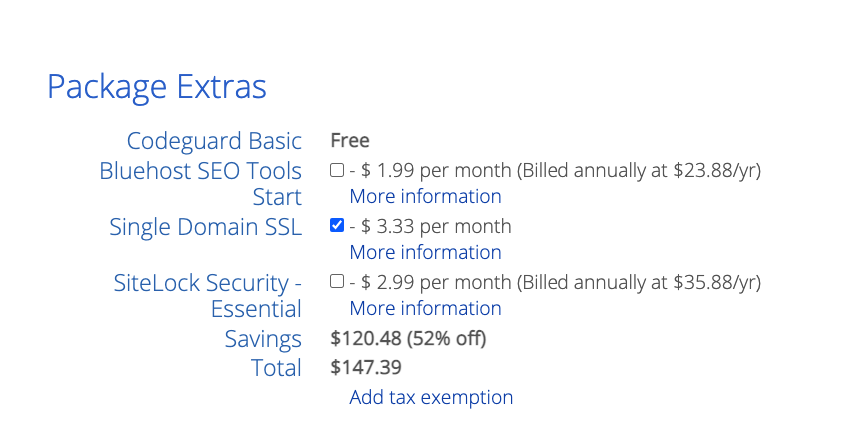
Choosing package extras:
I’d recommend unchecking them all, except for the Single Domain SSL option.
An SSL will make your site secure and show a padlock next to your domain name in your address bar.
If you don’t have one, people who visit your site will see your site is not secure, which isn’t good:
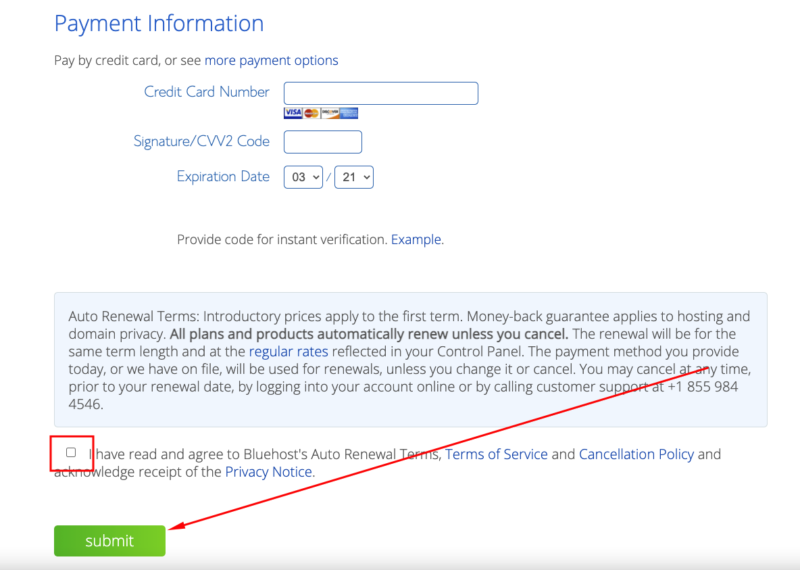
Enter in your payment information:
Now, enter your billing information to purchase your web hosting package.
Be sure to check the box to confirm you agree to BlueHost’s terms, then click the green Submit button:
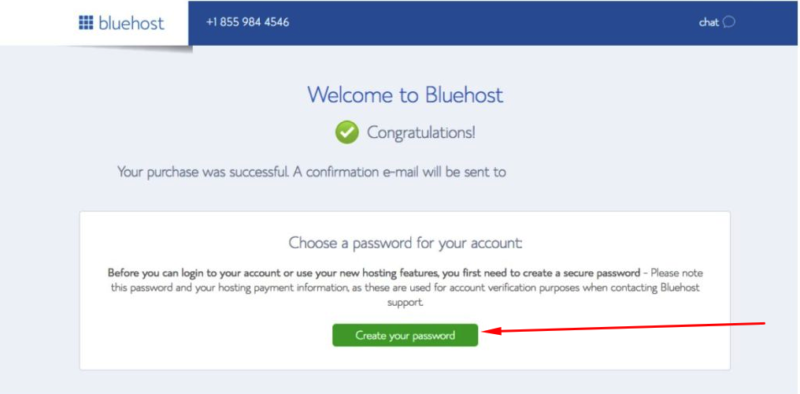
Order confirmation:
After you’ve purchased your hosting plan, BlueHost will confirm your order, and send you an email confirmation.
The next step is to create a password for your BlueHost account by clicking the green Create Your Password button
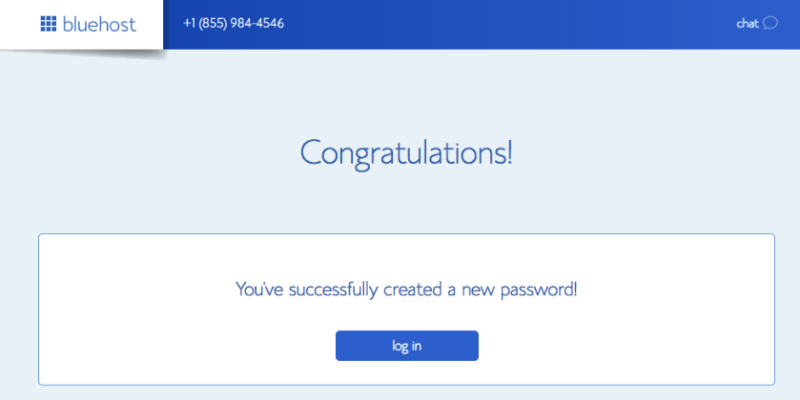
Log into your BlueHost account:
Here you’ll be able to log into your BlueHost account, by clicking the blue Log In button:
Step 2: Install A Website Builder
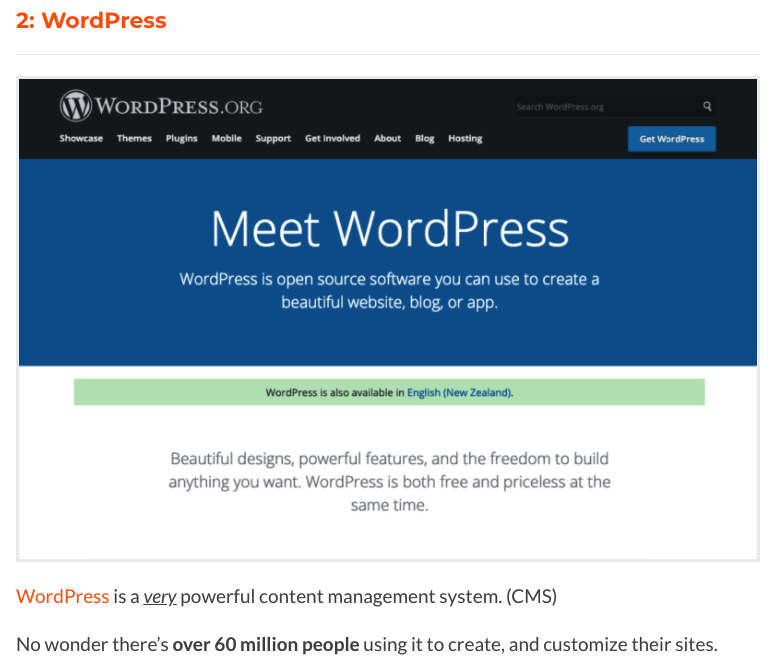
After you log into your BlueHost account, BlueHost will ask if you want “WordPress” installed.
You’ll say yes.
WordPress is what you’ll use to customize your site, and create/edit content.
To begin installing WordPress, pick a “theme” for your website:

A theme is the “styling” of your website.
You can change themes anytime after WordPress has been installed.
When you’ve chosen a theme, click the blue Start Building button:
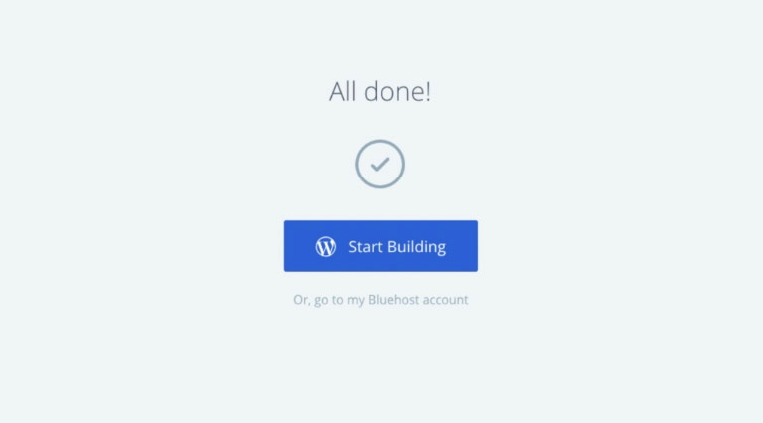
This will install WordPress.
When the installation is complete, you’ll get confirmation of the install.
Click the Login To WordPress tab:

This will take you to the WordPress dashboard, where you’ll go “behind the scenes” of your affiliate website:
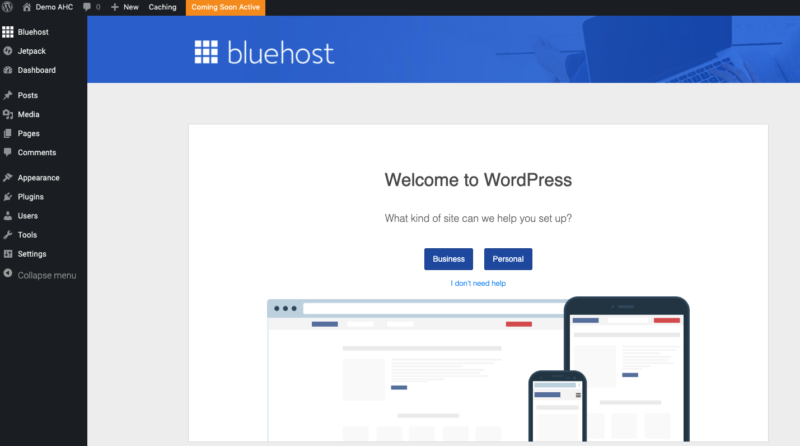
You’ll see a Welcome To WordPress message, along with steps to getting the basics set up.
I’d recommend you go through these steps:
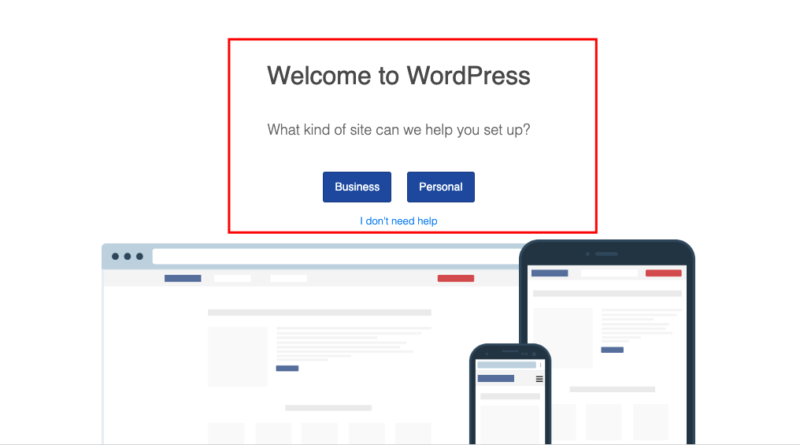
You can safely click the blue I Don’t Need Help tab if you’d like to do that later.
Step 3: Customize Your Affiliate Website
There are so many different things you can do in WordPress.
So, please watch this video:
How To Promote Affiliate Products On Your Website
There are many different ways you can promote affiliate products on your website.
Here are 4 ways that work really well…
1: Product Reviews
This is one of the most popular ways to promote affiliate products because it’s so easy.
All you’re doing is reviewing different products,
You can do a review of just 1 product.
Or you can do product comparisons, and review multiple products side by side.
Either way works well.
Here’s an example of a product review where I review ClickMagick, a link tracking service:

When reviewing products, be as in-depth (and honest) as possible.
The more in-depth you are, the more you’ll seem like a trusted source.
For example:
Consider mentioning the different features (along with screen shots/images where possible) of the products you review:
And perhaps mention the pros & cons:
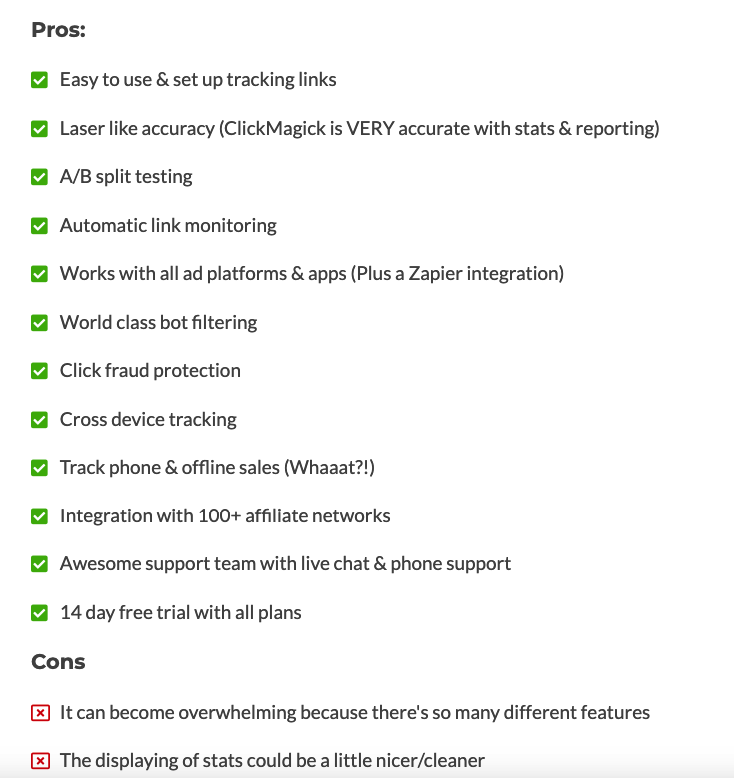
The more in-depth you can be, the better the review will do.
Just remember to be honest & transparent.
2: How To Posts
Personally, this is one of my favorite ways to promote products.
These are posts where you teach people “how to do” or “achieve” something.
For example:
I have this post that teaches people how to do affiliate marketing on Pinterest:
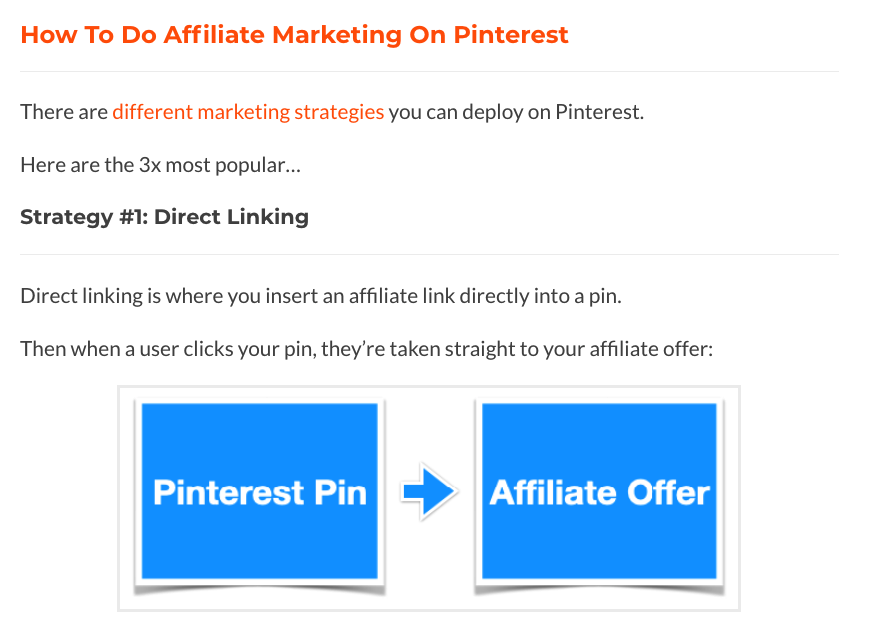
The post lists different strategies people can use to promote their affiliate products on Pinterest.
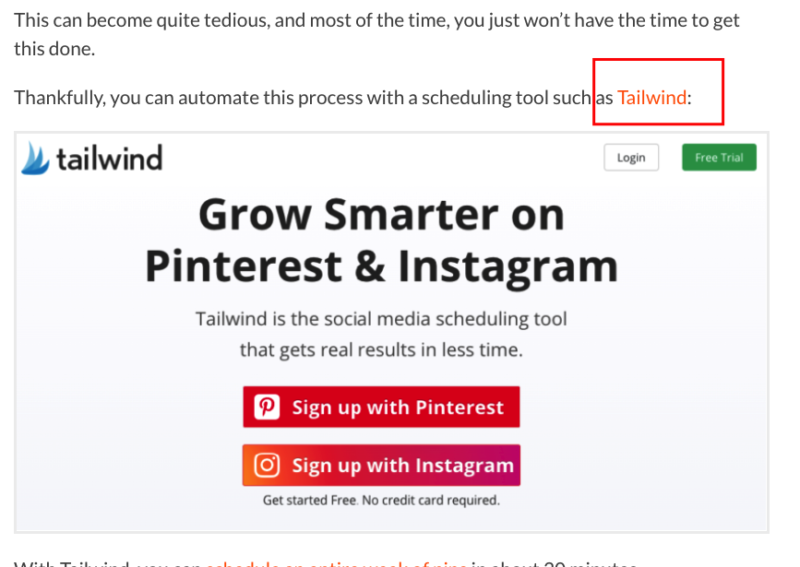
And at the same time, I’m promoting TailWind, an affiliate product:
With these types of posts, what makes them really “pop” is being as detailed as possible within the post.
And, to ensure the product being promoted is relevant to the content.
3: List Posts
Lists posts are powerful, and also really easy to create.
It’s simply a post where you feature a numbered list of “something.”
For example:
In this post, I list the 5 Best Affiliate Programs for Beginners:

Within the post, some of the affiliate programs being recommended are affiliate links.
I don’t list just the affiliate programs though.
I also mention pro’s and con’s to each affiliate program:
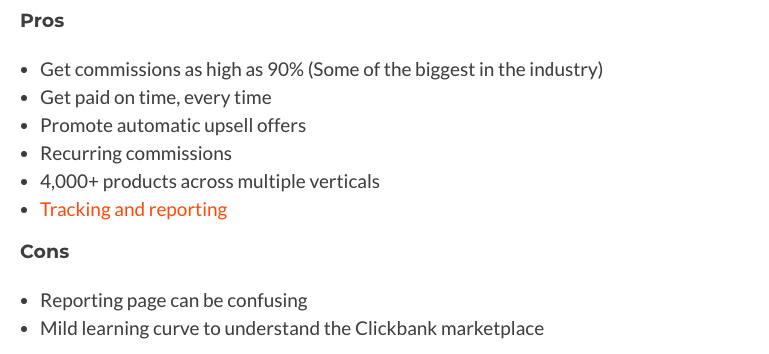
This gives the post “more meat,” and more info to the reader, so they get as much info as possible about each affiliate program.
You can create list posts for virtually anything.
They’re powerful, yet really simple to create.
4: Resources/Tools Page
Many website owners do this, because it’s easy, and it works.
It’s simply a page (or a post) where you list out different resources/tools you think your audience will benefit from.
And of course, some of the resources you list should be for affiliate products.
You’ll normally see these types of pages in the header or footer of a website.
For example:
I have this tools post, which lists some of the best tools/resources for affiliate marketing:
I use this post as a “stand alone” post (like a stand alone resources page) where I’ve added a link to that post in the menu of my blog.
As shown here:

By showing it in the menu, it gives visitors the option to view the different tools when they’re browsing my blog.
You can also do this for your own niche and affiliate products.
It works great, and can be set up in no time at all.
Recap Of How To Create An
Affiliate Website In 2024
Step 1: Get a domain name and setup web hosting
Step 2: Install WordPress
Step 3: Customize your affiliate website
Step 4: Write content for affiliate your website
Step 5: Promote products on your affiliate website
Conclusion
And there we go.
How to create an affiliate marketing website.
Everything you need to get up and running can be done with BlueHost.
Even more:
There are simple tools you can use to help you in your affiliate journey.
Now over to you…
“Are you ready to create an affiliate site of your own?”
Let me know in the comments below.
I’d love to hear from you!